> ## Documentation Index
> Fetch the complete documentation index at: https://docs.automq.com/llms.txt
> Use this file to discover all available pages before exploring further.
# Set Ops Authing from Google Cloud
> Enable AutoMQ to provide 24/7 monitoring by configuring Google Cloud GCS operational authorization for cross-account access, ensuring seamless data management.
Referencing [Manage Environment Ops Authing▸](/automq-cloud/manage-environments/manage-environment-ops-authing), when using the AutoMQ Cloud BYOC product, the AutoMQ service provider requires users to provide the appropriate operational authorization. Users can grant cross-account access to the Ops Bucket, where AutoMQ stores logs and monitoring data, enabling AutoMQ to deliver 24/7 monitoring and governance for the customer's production environment. This document explains how to configure managed operational authorization on Google Cloud GCS.
In this document, references to the AutoMQ product service provider, AutoMQ service provider, and AutoMQ all specifically mean AutoMQ HK Limited.
### Google Cloud Environment Authorization
GCS on Google Cloud offers a web interface and simplified policy authorization.
#### Console Operational Steps
Log in to the cloud account that owns the Ops Bucket and switch to the corresponding Project. Then navigate to the [GCS Console](https://console.cloud.google.com/storage/browser):
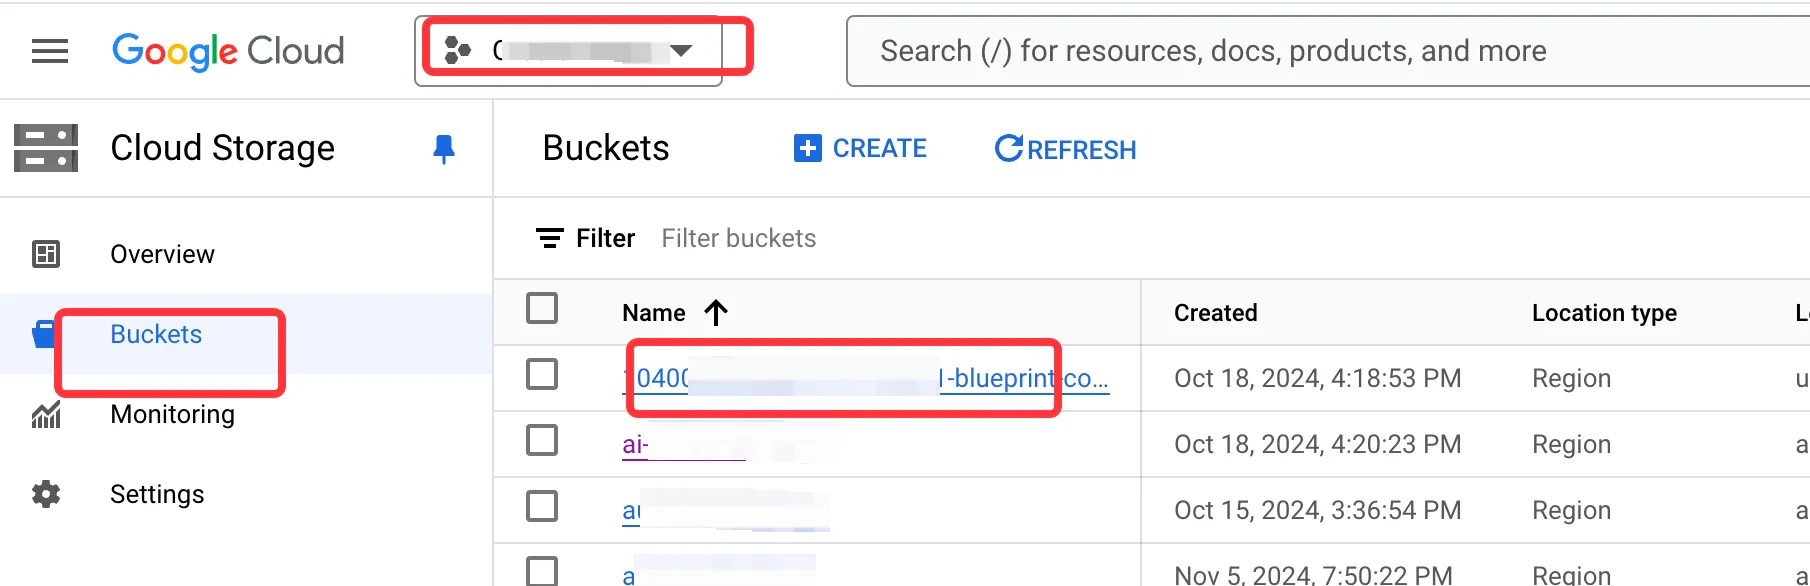
1. **Navigate to the Bucket List page to find the target OpsBucket.** Access the GCS Console and click the **Bucket List** in the left navigation bar to enter the list page. Search for the operations Bucket configured in the current environment, and click on details.
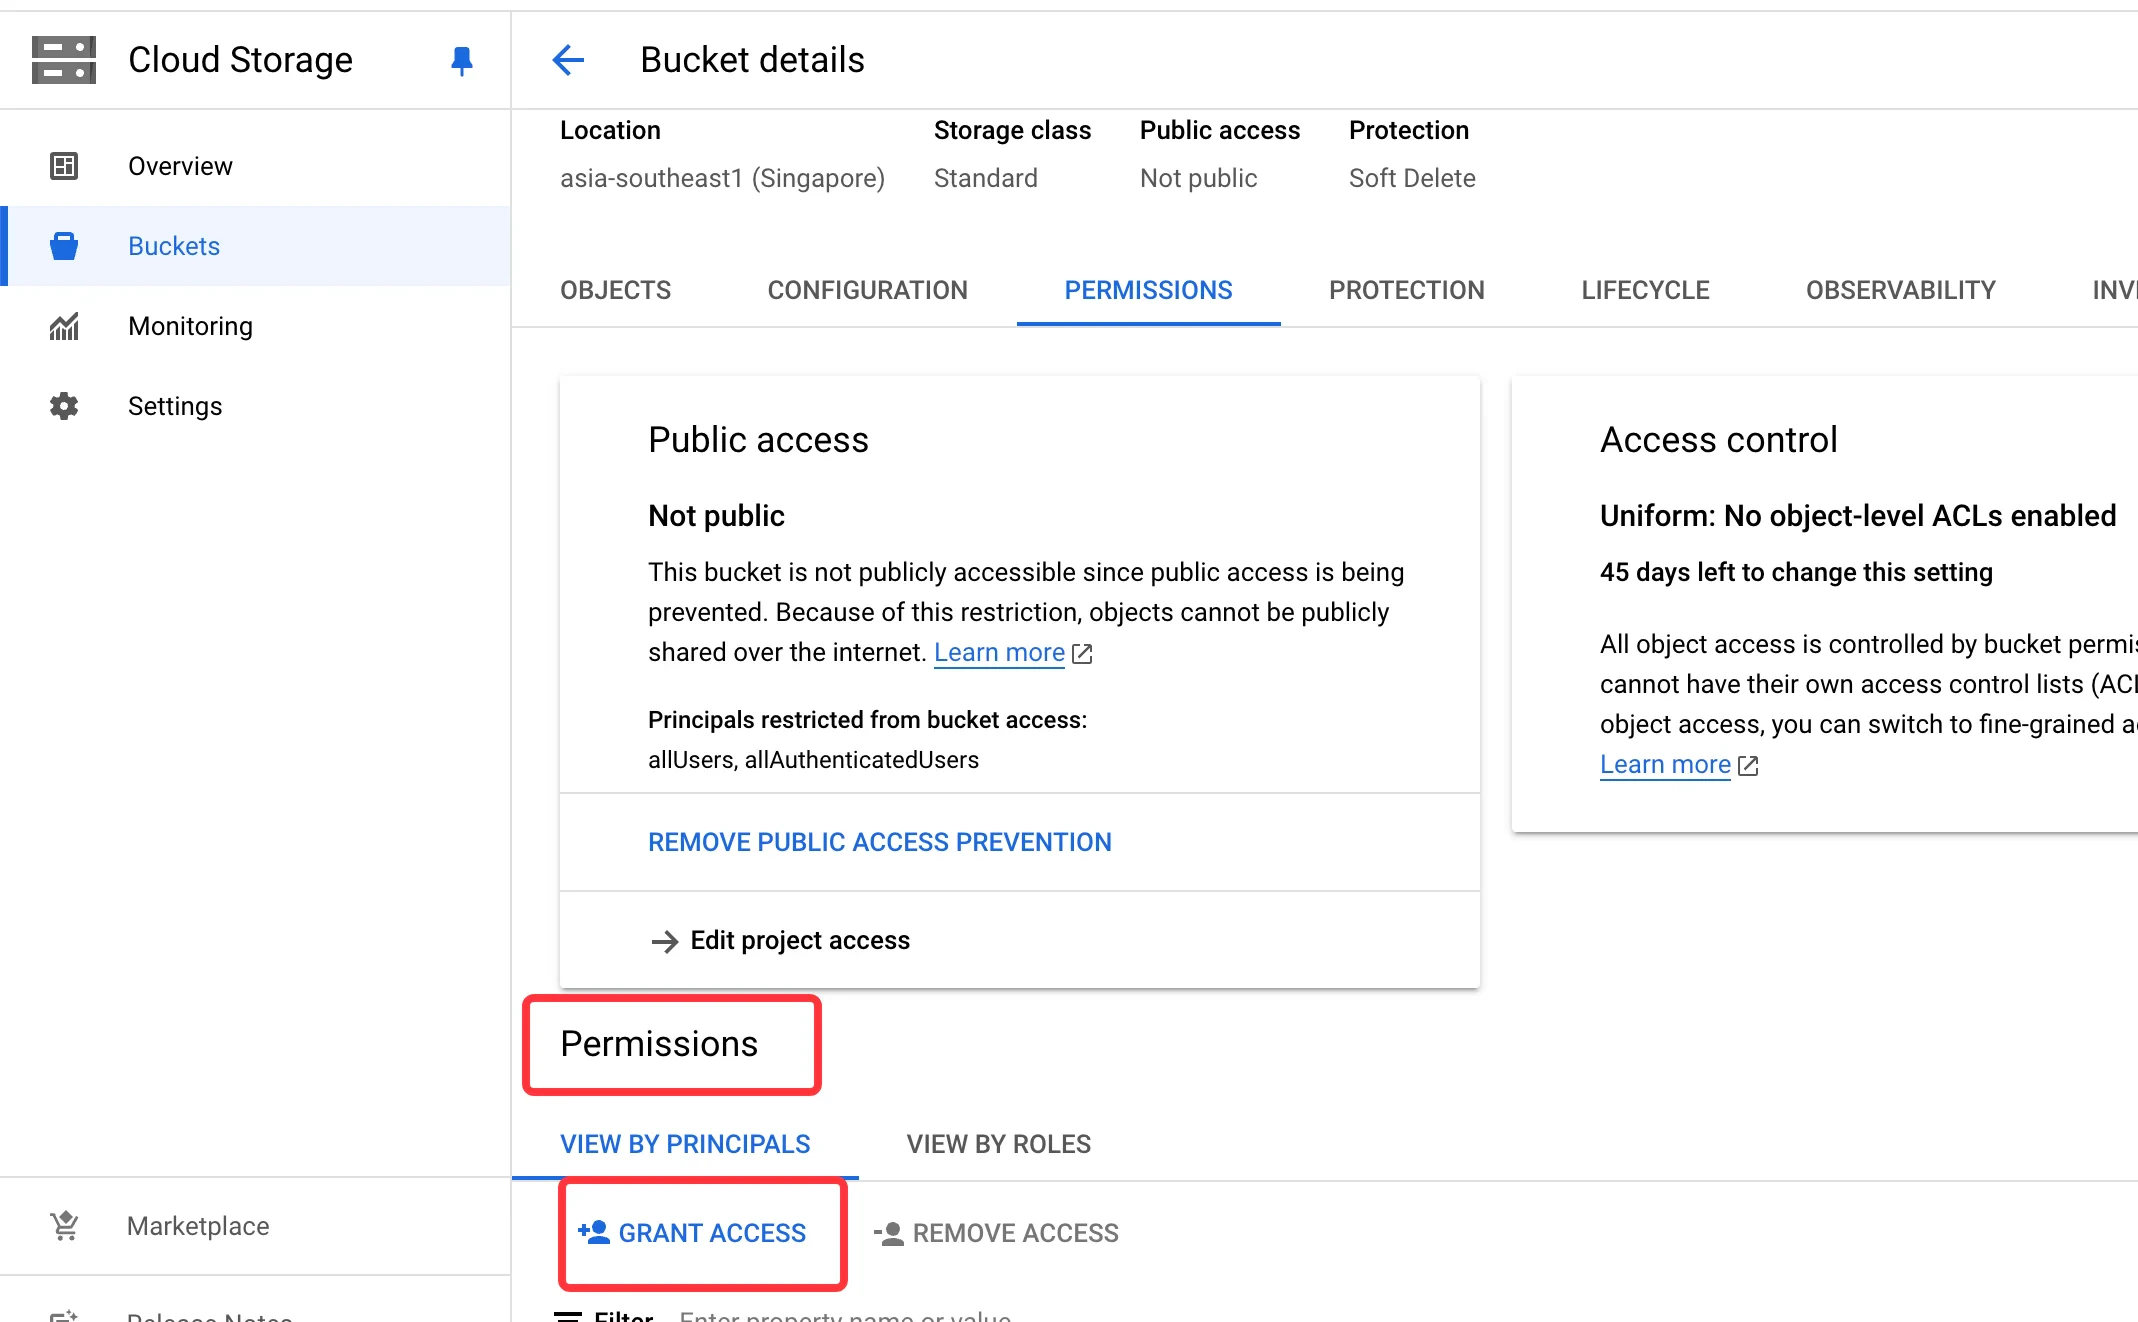
 2. **Go to Permission Management > Add Authorization.** Click the add authorization button to open the form for new authorization.
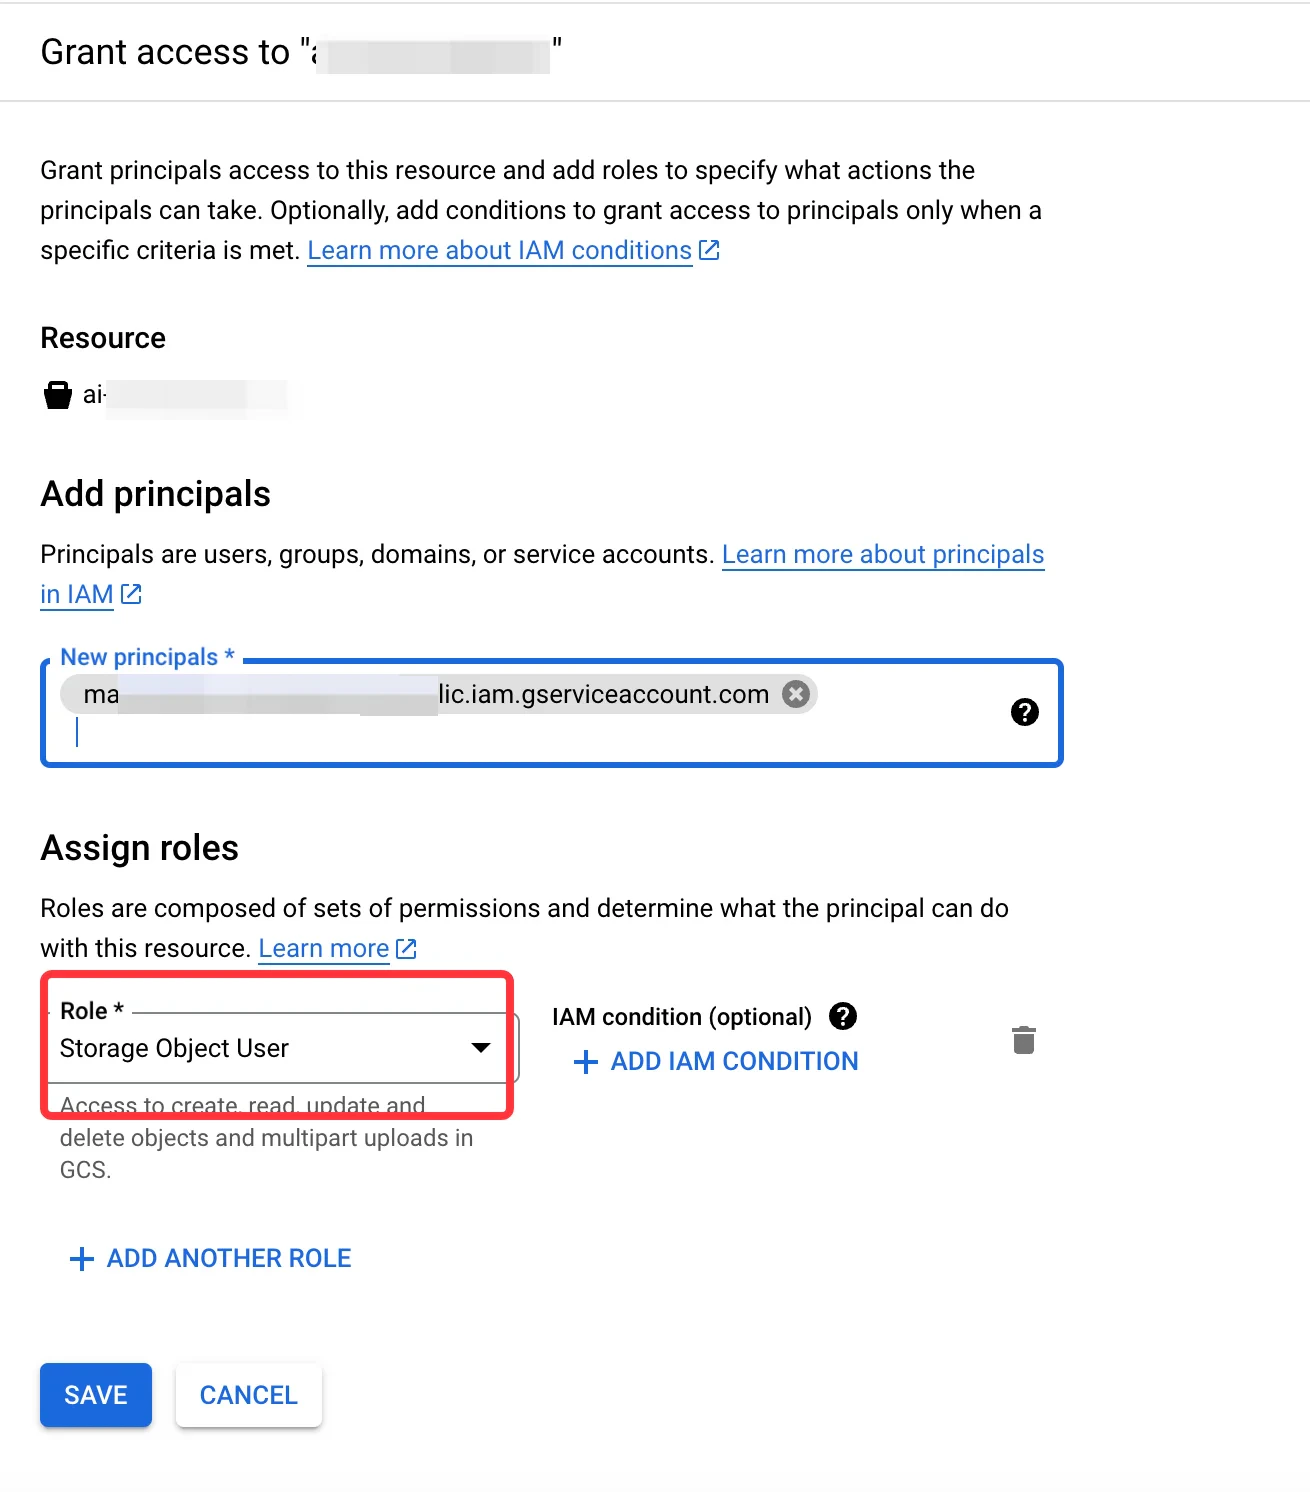
 3. **Add the Bucket Authorization Policy according to the template information.** Refer to the following instructions to fill in the respective authorization information, click confirm, and complete the authorization policy creation.
* **Authorized main account:** Refer to the **Authorization Principle** section of this document and select the AutoMQ service-side **service account "[automq-public-ops-authing@automq-public.iam.gserviceaccount.com](mailto:automq-public-ops-authing@automq-public.iam.gserviceaccount.com)".**
* **Bound Role:** Choose the **Storage Object User** role.
3. **Add the Bucket Authorization Policy according to the template information.** Refer to the following instructions to fill in the respective authorization information, click confirm, and complete the authorization policy creation.
* **Authorized main account:** Refer to the **Authorization Principle** section of this document and select the AutoMQ service-side **service account "[automq-public-ops-authing@automq-public.iam.gserviceaccount.com](mailto:automq-public-ops-authing@automq-public.iam.gserviceaccount.com)".**
* **Bound Role:** Choose the **Storage Object User** role.