> ## Documentation Index
> Fetch the complete documentation index at: https://docs.automq.com/llms.txt
> Use this file to discover all available pages before exploring further.
# Flink
> Integrate Flink with AutoMQ for real-time data stream analysis with Flink and AutoMQ. Enjoy 100% Kafka compatibility, cloud-native scalability, and over 10x cost savings.
## Introduction
[Apache Flink](https://flink.apache.org/) is a renowned stream processing engine widely used in event-driven, stream-batch analysis scenarios. [AutoMQ](https://github.com/AutoMQ/automq) is a highly elastic cloud-native Kafka that brings over 10x cost reduction and elasticity benefits through cloud-native modifications to the Kafka storage layer. Thanks to AutoMQ's 100% compatibility with Kafka, it can easily leverage existing Kafka ecosystem tools to read and write with Flink. This article will demonstrate how Flink can read data from an AutoMQ Topic, perform data analysis, and then write the results back to AutoMQ using a WordCount example.
## Environment Setup
### Install and Launch Flink
This document uses Flink version v1.19.0. Follow the official documentation [Flink First Step](https://nightlies.apache.org/flink/flink-docs-release-1.19/docs/try-flink/local_installation/) to deploy a v1.19.0 Flink service.
### Install and Launch AutoMQ
Refer to the [Deploy Multi-Nodes Cluster on Linux▸](/automq/deployment/deploy-multi-nodes-cluster-on-linux) documentation to deploy an AutoMQ cluster. In this example, the AutoMQ version used is v1.0.4.
### Prepare Test Topic and Data
Create a topic `to-flink` to store data that needs to be imported into Flink for analysis and computation.
```bash theme={null}
### The Default Port for Locally Installed AutoMQ Is 9094.
bin/kafka-topics.sh --create --topic to-flink --bootstrap-server localhost:9094
```
Use the command-line tool to write a batch of data for word count computation.
```bash theme={null}
bin/kafka-console-producer.sh --topic to-flink --bootstrap-server localhost:9094
```
The data to be written is as follows, and you can exit the producer by pressing Ctrl+C after finishing the input.
```text theme={null}
apple
apple
banana
banana
banana
cherry
cherry
pear
pear
pear
lemon
lemon
mango
mango
mango
```
Finally, we hope that the result obtained through Flink computation will be.
```text theme={null}
apple 2
banana 3
cherry 2
pear 3
lemon 2
mango 3
```
After writing is complete, we can try to consume the data to confirm it was successfully written.
```bash theme={null}
bin/kafka-console-consumer.sh --topic to-flink --from-beginning --bootstrap-server localhost:9094
```
Create a topic to receive the results of Flink computations.
```bash theme={null}
bin/kafka-topics.sh --create --topic from-flink --bootstrap-server localhost:9094
```
## Read Data from AutoMQ into Flink for Analysis.
Thanks to AutoMQ's full compatibility with Kafka, we can directly use the [Kafka Connector](https://nightlies.apache.org/flink/flink-docs-release-1.19/docs/connectors/datastream/kafka/) provided by Flink to write the source and sink code to load data from AutoMQ's Topic.
### POM Dependencies
```xml theme={null}
....
org.apache.flink
flink-java
1.19.0
org.apache.flink
flink-streaming-java
1.19.0
org.apache.flink
flink-clients
1.19.0
org.apache.flink
flink-connector-kafka
1.17.2
....
org.apache.maven.plugins
maven-shade-plugin
3.5.2
package
shade
automq-wordcount-flink-job
*:*
META-INF/*.SF
META-INF/*.DSA
META-INF/*.RSA
com.automq.example.flink.WordCount
```
### Writing the Flink Job Code
The following Java code defines an AutoMQ source and sink using KafkaSource and KafkaSink, respectively. It first reads the pre-prepared "fruit list" test data from the topic to-flink. Then, it creates a DataStream to perform the WordCount computation and sinks the result into the AutoMQ topic from-flink.
```java theme={null}
/*
* Licensed to the Apache Software Foundation (ASF) under one or more
* contributor license agreements. See the NOTICE file distributed with
* this work for additional information regarding copyright ownership.
* The ASF licenses this file to You under the Apache License, Version 2.0
* (the "License"); you may not use this file except in compliance with
* the License. You may obtain a copy of the License at
*
* http://www.apache.org/licenses/LICENSE-2.0
*
* Unless required by applicable law or agreed to in writing, software
* distributed under the License is distributed on an "AS IS" BASIS,
* WITHOUT WARRANTIES OR CONDITIONS OF ANY KIND, either express or implied.
* See the License for the specific language governing permissions and
* limitations under the License.
*/
package com.automq.example.flink.WordCount;
import org.apache.flink.api.common.eventtime.WatermarkStrategy;
import org.apache.flink.api.common.functions.FlatMapFunction;
import org.apache.flink.api.common.serialization.SimpleStringSchema;
import org.apache.flink.api.java.tuple.Tuple2;
import org.apache.flink.connector.kafka.sink.KafkaRecordSerializationSchema;
import org.apache.flink.connector.kafka.sink.KafkaSink;
import org.apache.flink.connector.kafka.source.KafkaSource;
import org.apache.flink.connector.kafka.source.enumerator.initializer.OffsetsInitializer;
import org.apache.flink.streaming.api.datastream.DataStream;
import org.apache.flink.streaming.api.environment.StreamExecutionEnvironment;
import org.apache.flink.util.Collector;
/**
* This is a re-write of the Apache Flink WordCount example using Kafka connectors.
* Find the reference example at https://github.com/redpanda-data/flink-kafka-examples/blob/main/src/main/java/io/redpanda/examples/WordCount.java
*/
public class WordCount {
final static String TO_FLINK_TOPIC_NAME = "to-flink";
final static String FROM_FLINK_TOPIC_NAME = "from-flink";
final static String FLINK_JOB_NAME = "WordCount";
public static void main(String[] args) throws Exception {
// Use your AutoMQ cluster's bootstrap servers here
final String bootstrapServers = args.length > 0 ? args[0] : "localhost:9094";
// Set up the streaming execution environment
final StreamExecutionEnvironment env = StreamExecutionEnvironment.getExecutionEnvironment();
KafkaSource source = KafkaSource.builder()
.setBootstrapServers(bootstrapServers)
.setTopics(TO_FLINK_TOPIC_NAME)
.setGroupId("automq-example-group")
.setStartingOffsets(OffsetsInitializer.earliest())
.setValueOnlyDeserializer(new SimpleStringSchema())
.build();
KafkaRecordSerializationSchema serializer = KafkaRecordSerializationSchema.builder()
.setValueSerializationSchema(new SimpleStringSchema())
.setTopic(FROM_FLINK_TOPIC_NAME)
.build();
KafkaSink sink = KafkaSink.builder()
.setBootstrapServers(bootstrapServers)
.setRecordSerializer(serializer)
.build();
DataStream text = env.fromSource(source, WatermarkStrategy.noWatermarks(), "AutoMQ Source");
// Split up the lines in pairs (2-tuples) containing: (word,1)
DataStream counts = text.flatMap(new Tokenizer())
// Group by the tuple field "0" and sum up tuple field "1"
.keyBy(value -> value.f0)
.sum(1)
.flatMap(new Reducer());
// Add the sink to so results
// are written to the outputTopic
counts.sinkTo(sink);
// Execute program
env.execute(FLINK_JOB_NAME);
}
/**
* Implements the string tokenizer that splits sentences into words as a user-defined
* FlatMapFunction. The function takes a line (String) and splits it into multiple pairs in the
* form of "(word,1)" ({@code Tuple2}).
*/
public static final class Tokenizer
implements
FlatMapFunction> {
@Override
public void flatMap(String value, Collector> out) {
// Normalize and split the line
String[] tokens = value.toLowerCase().split("\\W+");
// Emit the pairs
for (String token : tokens) {
if (token.length() > 0) {
out.collect(new Tuple2<>(token, 1));
}
}
}
}
// Implements a simple reducer using FlatMap to
// reduce the Tuple2 into a single string for
// writing to kafka topics
public static final class Reducer
implements
FlatMapFunction, String> {
@Override
public void flatMap(Tuple2 value, Collector out) {
// Convert the pairs to a string
// for easy writing to Kafka Topic
String count = value.f0 + " " + value.f1;
out.collect(count);
}
}
}
```
The following code, after being built using mvn, will generate an automq-wordcount-flink-job.jar, which is the job we need to submit to Flink.
### Submitting the Job to Flink
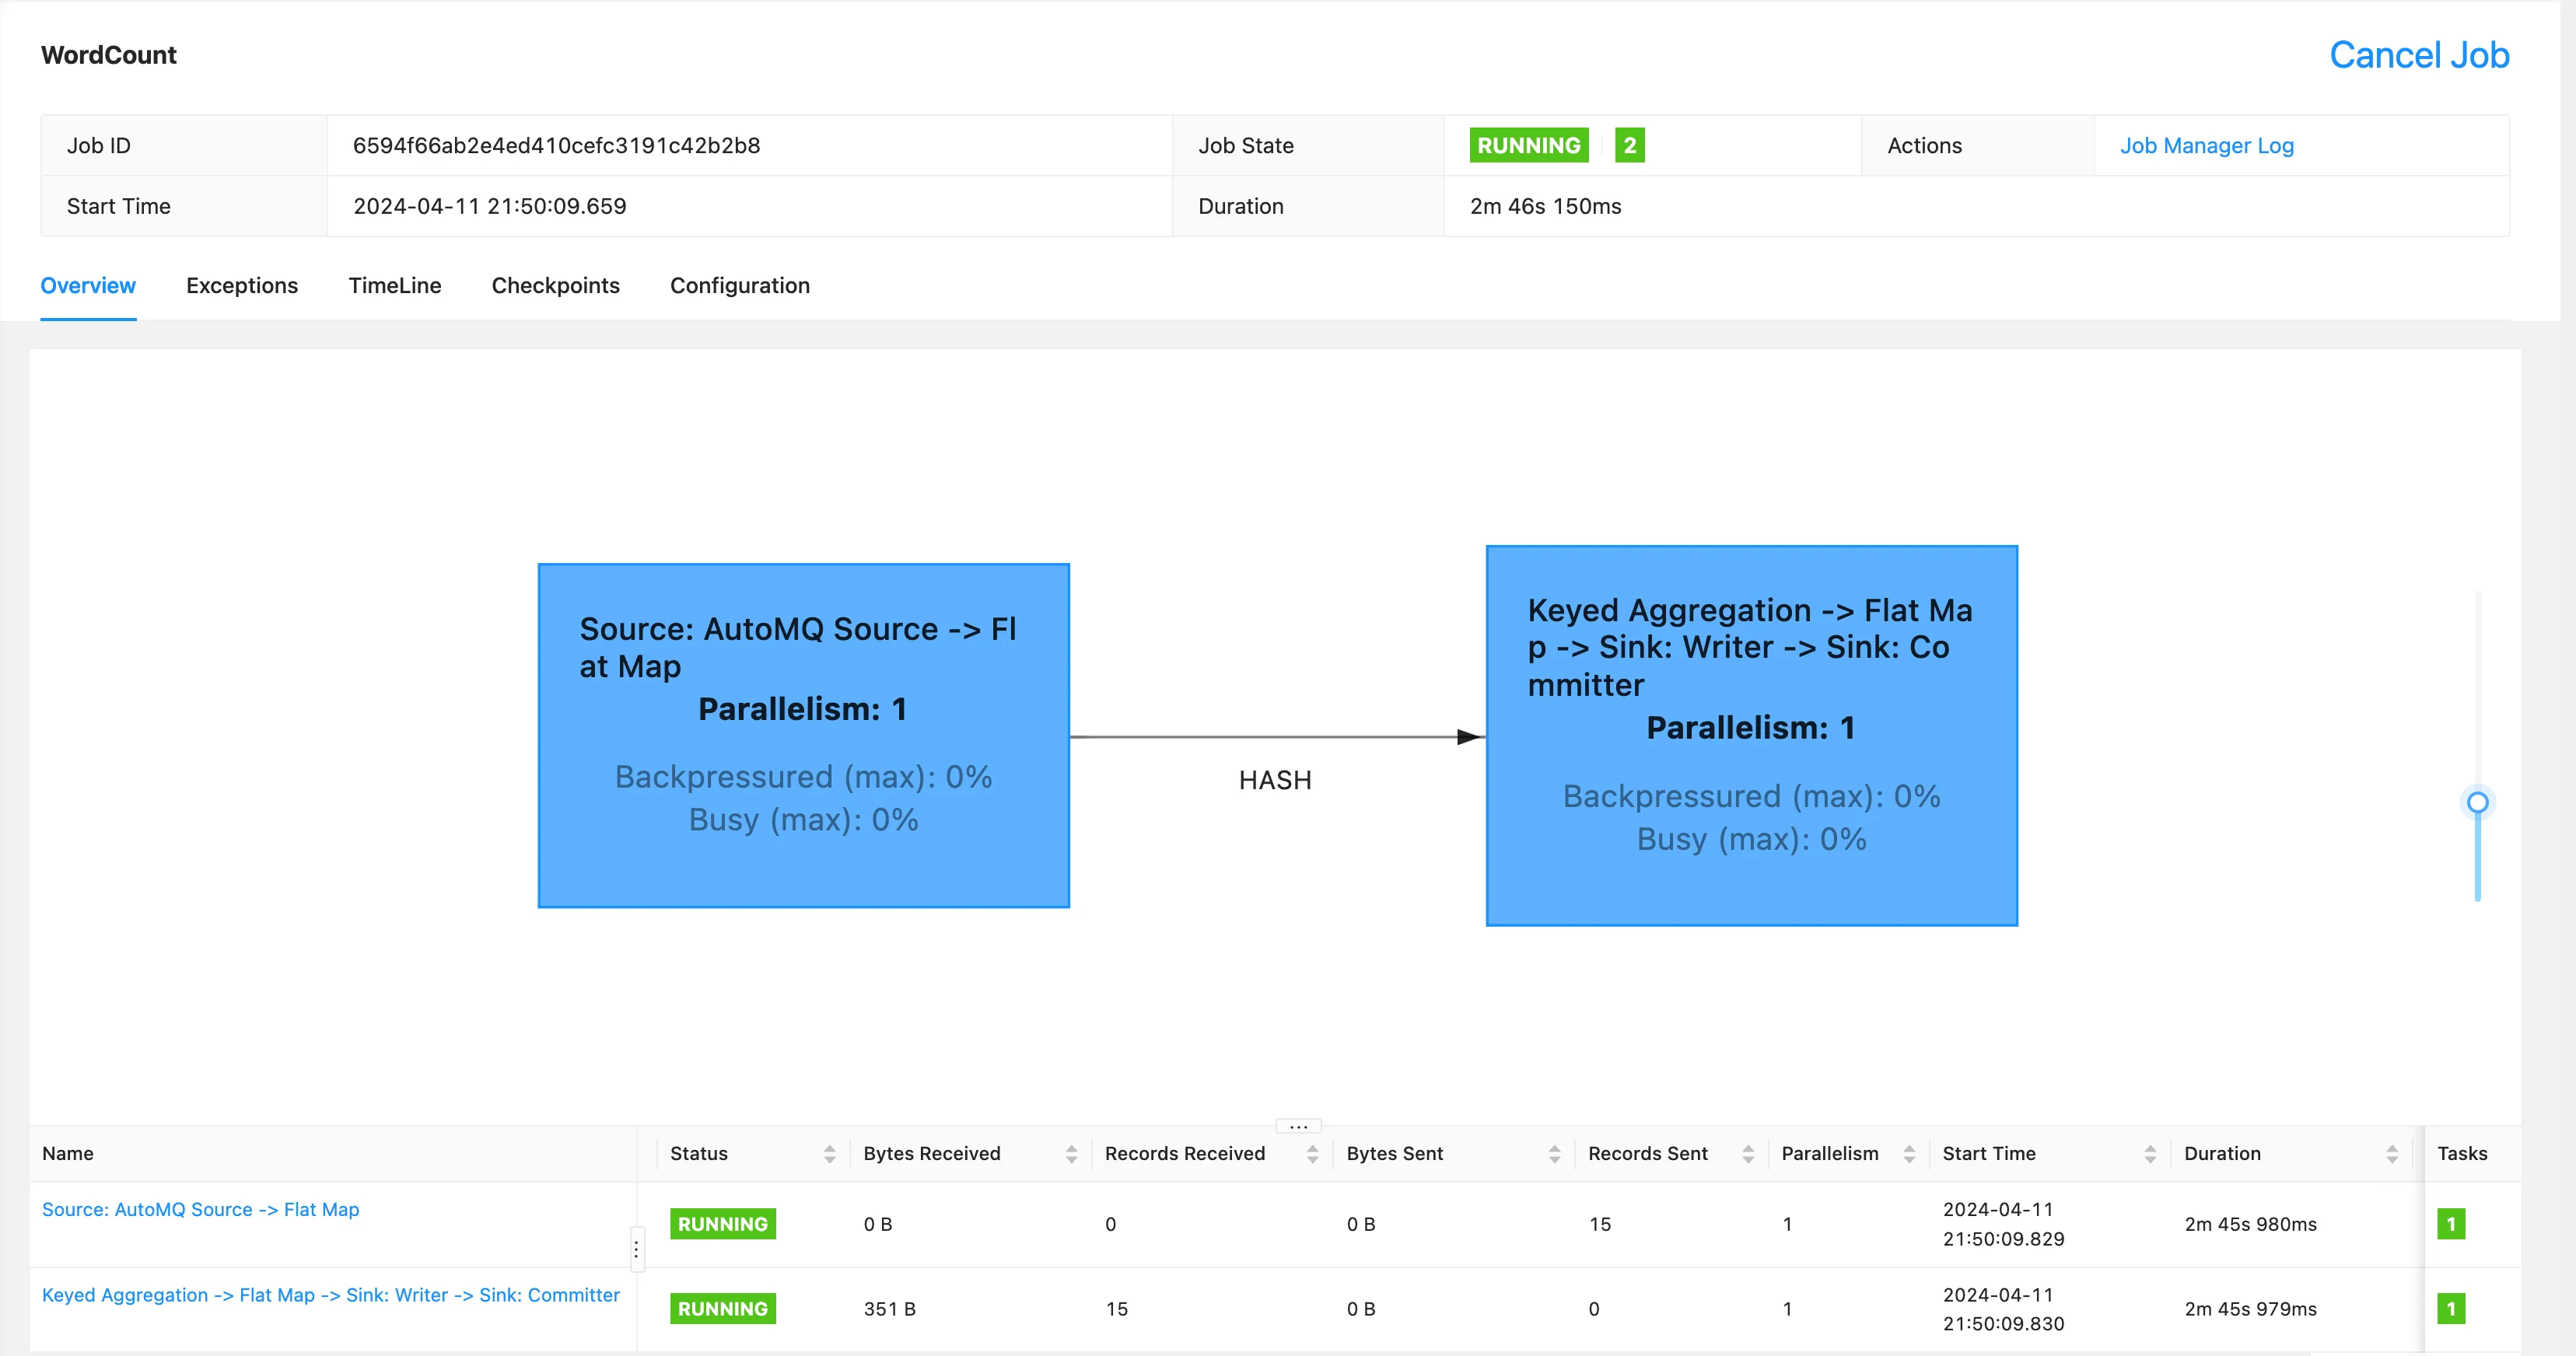
Execute the following command to submit the task jar to Flink. Through the console, we can see that 15 pieces of data have been received and processed.
```bash theme={null}
./bin/flink run automq-wordcount-flink-job.jar
```
 ### Verify the Analysis Results
Use the Kafka bin tools extracted from AutoMQ to consume data from `from-flink` and check the results:
```bash theme={null}
bin/kafka-console-consumer.sh --topic from-flink --from-beginning --bootstrap-server localhost:9094
```
You can see the output results below. Since it's processed in a stream and there is no watermark or window calculation set, the word count result is printed out every time a calculation is performed.
```text theme={null}
apple 1
apple 2
banana 1
banana 2
banana 3
cherry 1
cherry 2
pear 1
pear 2
pear 3
lemon 1
lemon 2
mango 1
mango 2
mango 3
```
Next, we write 5 more data entries to the `to-flink` Topic and observe the stream processing results:
```bash theme={null}
bin/kafka-console-producer.sh --topic to-flink --bootstrap-server localhost:9094
```
The data written is
```text theme={null}
apple
banana
cherry
pear
lemon
```
Then we can see that the `from-flink` Topic correctly outputs the following word count results
```text theme={null}
apple 3
banana 4
cherry 3
pear 4
lemon 3
```
We can also see on the console that 20 data entries were correctly received and processed:
### Verify the Analysis Results
Use the Kafka bin tools extracted from AutoMQ to consume data from `from-flink` and check the results:
```bash theme={null}
bin/kafka-console-consumer.sh --topic from-flink --from-beginning --bootstrap-server localhost:9094
```
You can see the output results below. Since it's processed in a stream and there is no watermark or window calculation set, the word count result is printed out every time a calculation is performed.
```text theme={null}
apple 1
apple 2
banana 1
banana 2
banana 3
cherry 1
cherry 2
pear 1
pear 2
pear 3
lemon 1
lemon 2
mango 1
mango 2
mango 3
```
Next, we write 5 more data entries to the `to-flink` Topic and observe the stream processing results:
```bash theme={null}
bin/kafka-console-producer.sh --topic to-flink --bootstrap-server localhost:9094
```
The data written is
```text theme={null}
apple
banana
cherry
pear
lemon
```
Then we can see that the `from-flink` Topic correctly outputs the following word count results
```text theme={null}
apple 3
banana 4
cherry 3
pear 4
lemon 3
```
We can also see on the console that 20 data entries were correctly received and processed:
 ## Summary
This article demonstrates how AutoMQ integrates with Flink to complete a Word Count analysis workflow. For more configurations and usage of the Kafka Connector, refer to the official Flink documentation [Apache Kafka Connector](https://nightlies.apache.org/flink/flink-docs-release-1.19/docs/connectors/datastream/kafka/).
## Summary
This article demonstrates how AutoMQ integrates with Flink to complete a Word Count analysis workflow. For more configurations and usage of the Kafka Connector, refer to the official Flink documentation [Apache Kafka Connector](https://nightlies.apache.org/flink/flink-docs-release-1.19/docs/connectors/datastream/kafka/).