> ## Documentation Index
> Fetch the complete documentation index at: https://docs.automq.com/llms.txt
> Use this file to discover all available pages before exploring further.
# Kafdrop
> 全面讲解如何在 AutoMQ 上集成使用 Kafdrop,以简化对 Kafka 集群的监控和管理,提高集群性能和资源利用率。
相关代码可以参考 [AutoMQ Labs](https://github.com/AutoMQ/automq-labs) 中的 AutoMQ 和 Kafdrop [集成样例](https://github.com/AutoMQ/automq-labs/tree/main/opensource-examples/ui/kafdrop),一键拉起体验。
## 前言
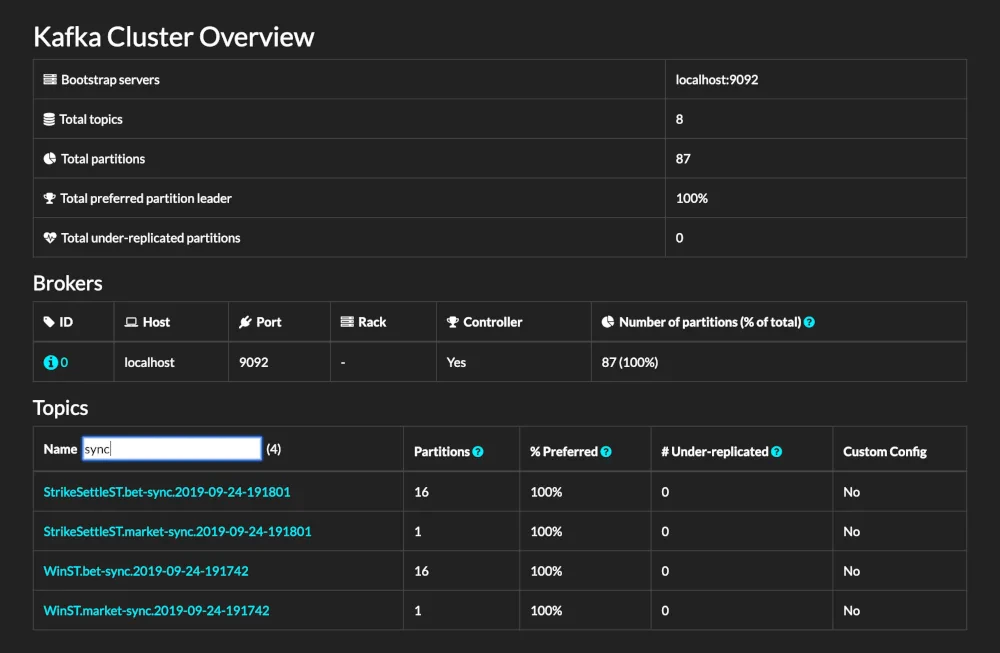
[Kafdrop](https://github.com/obsidiandynamics/kafdrop) \[1] 是一个为 Kafka 设计的简洁、直观且功能强大的 Web UI 工具。它允许开发者和管理员轻松地查看和管理 Kafka 集群的关键元数据,包括主题、分区、消费者组以及他们的偏移量等。通过提供一个用户友好的界面,Kafdrop 大大简化了 Kafka 集群的监控和管理过程,使得用户无需依赖复杂的命令行工具就能快速获取集群的状态信息。
得益于 AutoMQ 对 Kafka 的完全兼容,因此可以无缝与 Kafdrop 进行集成。通过利用 Kafdrop,AutoMQ 用户也可以享受到直观的用户界面,实时监控 Kafka 集群状态,包括主题、分区、消费者组及其偏移量等关键元数据。这种监控能力不仅提高了问题诊断的效率,还有助于优化集群性能和资源利用率。
这篇教程会教你如何启动 Kafdrop 服务,并将其与 AutoMQ 集群搭配起来使用,实现集群状态的监控和管理。
 ## 前置条件
* 一个可用的 Kafdrop 环境。
* 一个可用的 AutoMQ 集群。
## 安装并启动 AutoMQ 集群
可参考 AutoMQ 官网文档进行 AutoMQ 集群的部署:[Linux 主机部署多节点集群▸](/zh/automq/deployment/deploy-multi-nodes-cluster-on-linux) \[2]
## 启动 Kafdrop 服务
上述过程中,已经搭建了 AutoMQ 集群,并知道了所有的 broker 节点监听的地址和端口。接下来将着手启动 Kafdrop 的服务。
> 注意:要保证 Kafdrop 的服务所在地址是能够访问到 AutoMQ 集群的,否则会导致连接超时等问题。
Kafdrop 可以通过 JAR 包,Docker 部署 以及 protobuf 方式部署。可参考 [官方文档](https://github.com/obsidiandynamics/kafdrop/blob/master/README.md#getting-started) \[3] 。
本例采用 JAR 包的方式启动 Kafdrop 的服务。步骤如下:
* 拉取 Kafdrop 仓库源码:[Kafdrop github](https://github.com/obsidiandynamics/kafdrop) \[4]
```bash theme={null}
git clone https://github.com/obsidiandynamics/kafdrop.git
```
* 使用 Maven 在本地编译打包 Kafdrop,以生成 JAR 文件。在根目录下执行:
```bash theme={null}
mvn clean compile package
```
* 启动服务,需要指定 AutoMQ 集群 brokers 的地址和端口:
```bash theme={null}
java --add-opens=java.base/sun.nio.ch=ALL-UNNAMED \
-jar target/kafdrop-.jar \
--kafka.brokerConnect=,...
```
1. `kafdrop-.jar` 需要替换为具体版本,如 `kafdrop-4.0.2-SNAPSHOT.jar` 。
2. `--kafka.brokerConnect=` 需要指定 host 和 port 为具体的集群 broker 节点。
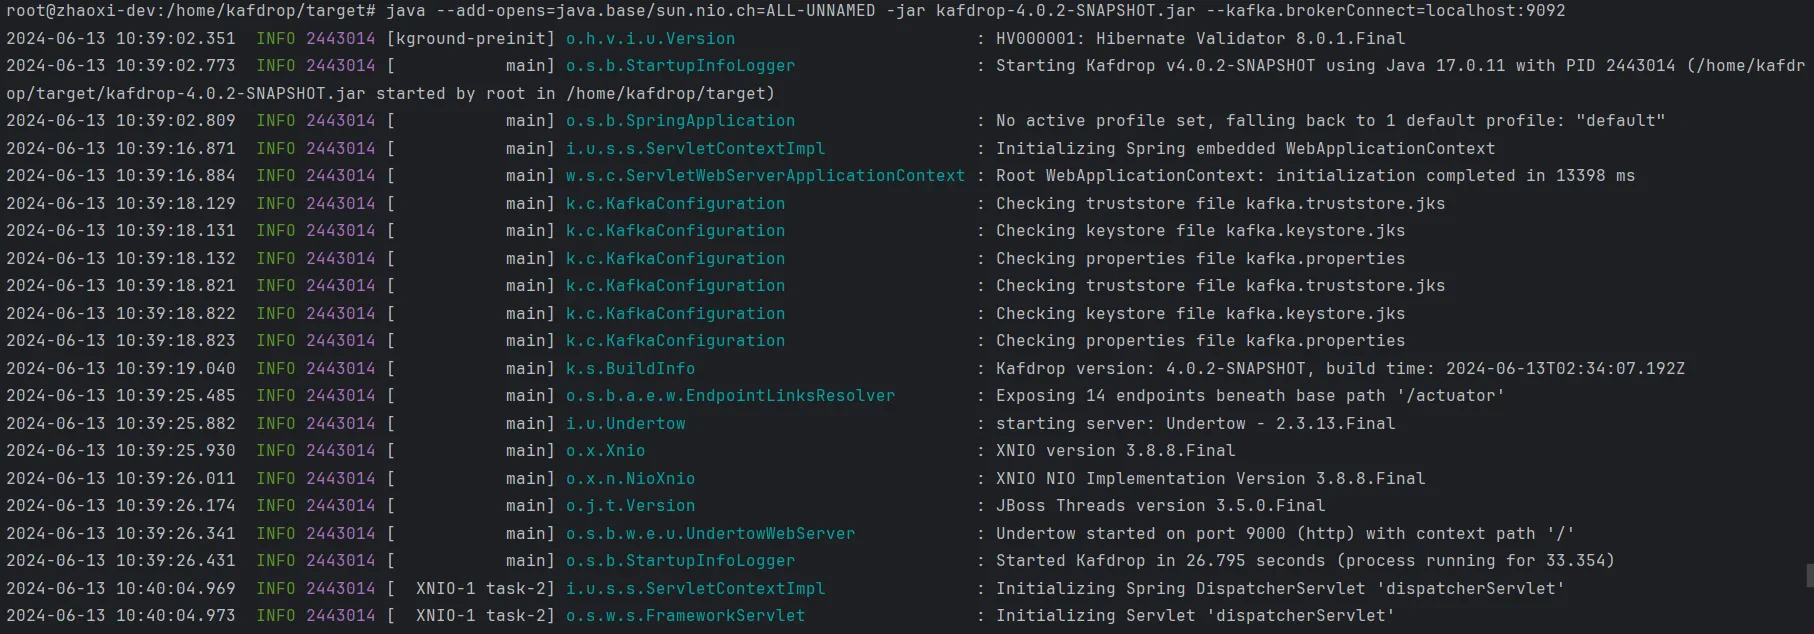
控制台启动效果如下:
## 前置条件
* 一个可用的 Kafdrop 环境。
* 一个可用的 AutoMQ 集群。
## 安装并启动 AutoMQ 集群
可参考 AutoMQ 官网文档进行 AutoMQ 集群的部署:[Linux 主机部署多节点集群▸](/zh/automq/deployment/deploy-multi-nodes-cluster-on-linux) \[2]
## 启动 Kafdrop 服务
上述过程中,已经搭建了 AutoMQ 集群,并知道了所有的 broker 节点监听的地址和端口。接下来将着手启动 Kafdrop 的服务。
> 注意:要保证 Kafdrop 的服务所在地址是能够访问到 AutoMQ 集群的,否则会导致连接超时等问题。
Kafdrop 可以通过 JAR 包,Docker 部署 以及 protobuf 方式部署。可参考 [官方文档](https://github.com/obsidiandynamics/kafdrop/blob/master/README.md#getting-started) \[3] 。
本例采用 JAR 包的方式启动 Kafdrop 的服务。步骤如下:
* 拉取 Kafdrop 仓库源码:[Kafdrop github](https://github.com/obsidiandynamics/kafdrop) \[4]
```bash theme={null}
git clone https://github.com/obsidiandynamics/kafdrop.git
```
* 使用 Maven 在本地编译打包 Kafdrop,以生成 JAR 文件。在根目录下执行:
```bash theme={null}
mvn clean compile package
```
* 启动服务,需要指定 AutoMQ 集群 brokers 的地址和端口:
```bash theme={null}
java --add-opens=java.base/sun.nio.ch=ALL-UNNAMED \
-jar target/kafdrop-.jar \
--kafka.brokerConnect=,...
```
1. `kafdrop-.jar` 需要替换为具体版本,如 `kafdrop-4.0.2-SNAPSHOT.jar` 。
2. `--kafka.brokerConnect=` 需要指定 host 和 port 为具体的集群 broker 节点。
控制台启动效果如下:
 如果未指定,则 `kafka.brokerConnect` 默认为 `localhost:9092` 。
**注意:** 从 Kafdrop 3.10.0 开始,不再需要 ZooKeeper 连接。所有必要的集群信息都通过 Kafka 管理 API 检索。
打开浏览器并导航到 [http://localhost:9000](http://localhost:9000/)。可以通过添加以下配置来覆盖端口:
```bash theme={null}
--server.port= --management.server.port=
```
## 最终效果
1. 完整界面
如果未指定,则 `kafka.brokerConnect` 默认为 `localhost:9092` 。
**注意:** 从 Kafdrop 3.10.0 开始,不再需要 ZooKeeper 连接。所有必要的集群信息都通过 Kafka 管理 API 检索。
打开浏览器并导航到 [http://localhost:9000](http://localhost:9000/)。可以通过添加以下配置来覆盖端口:
```bash theme={null}
--server.port= --management.server.port=
```
## 最终效果
1. 完整界面
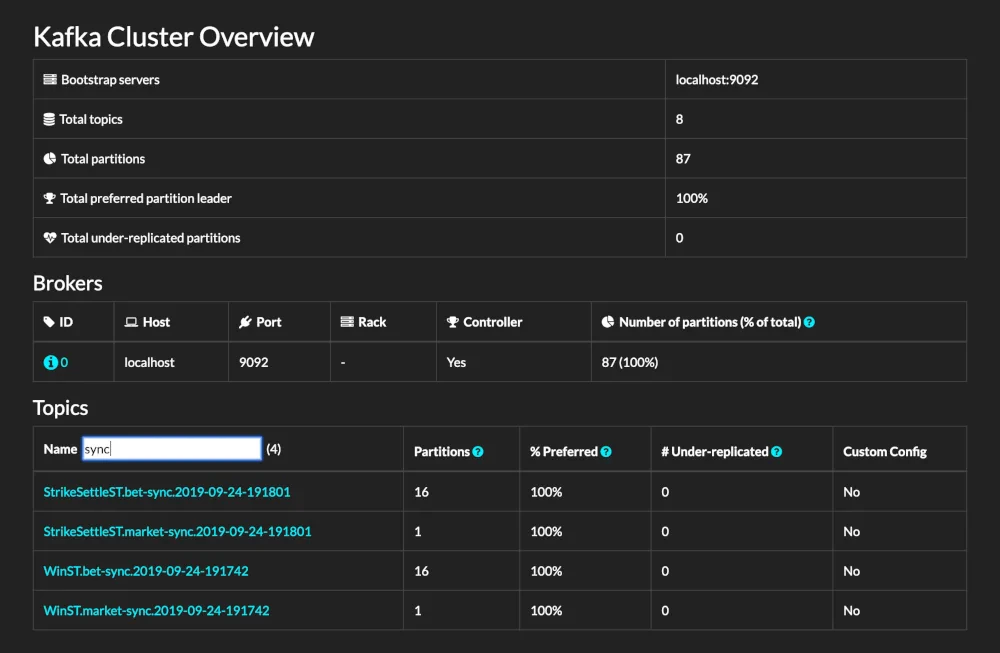 展示了分区数,Topics 数以及其他集群状态信息。
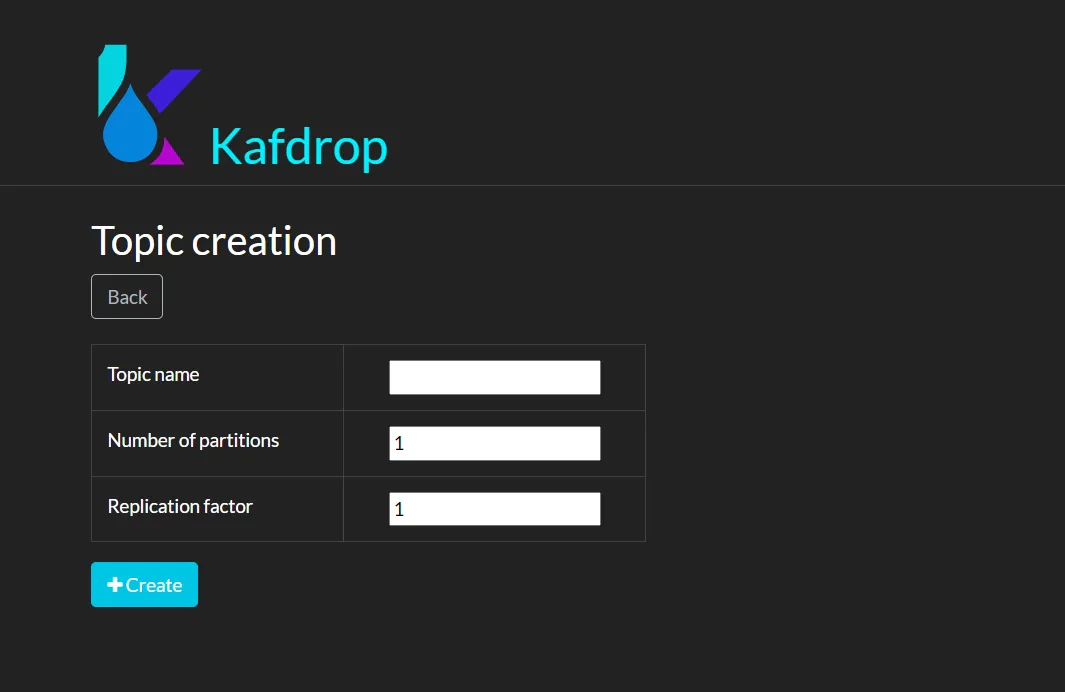
2. 新建 Topic 功能
展示了分区数,Topics 数以及其他集群状态信息。
2. 新建 Topic 功能
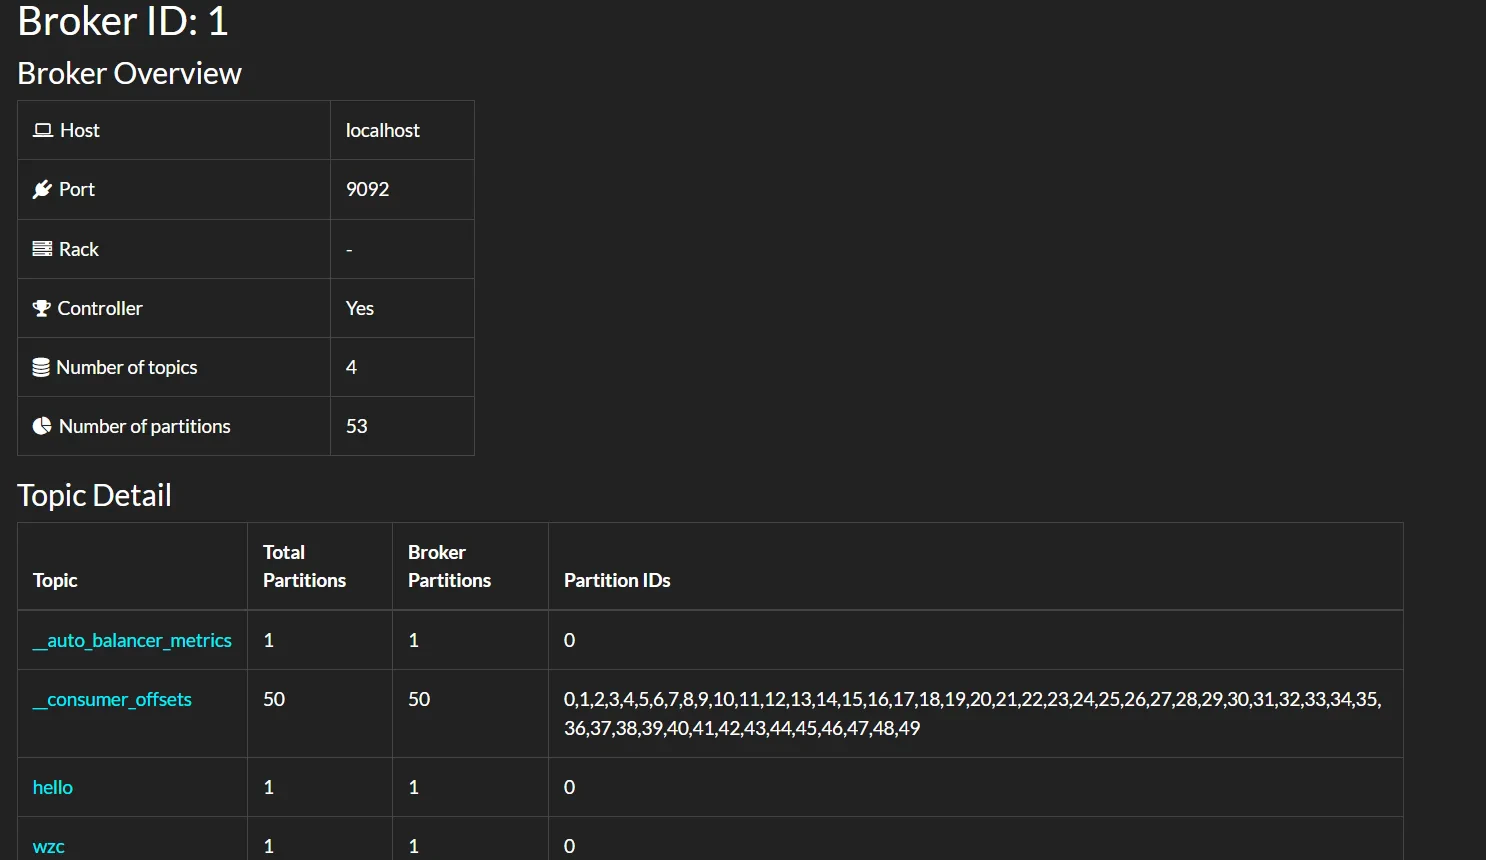
 3. broker 节点详细信息
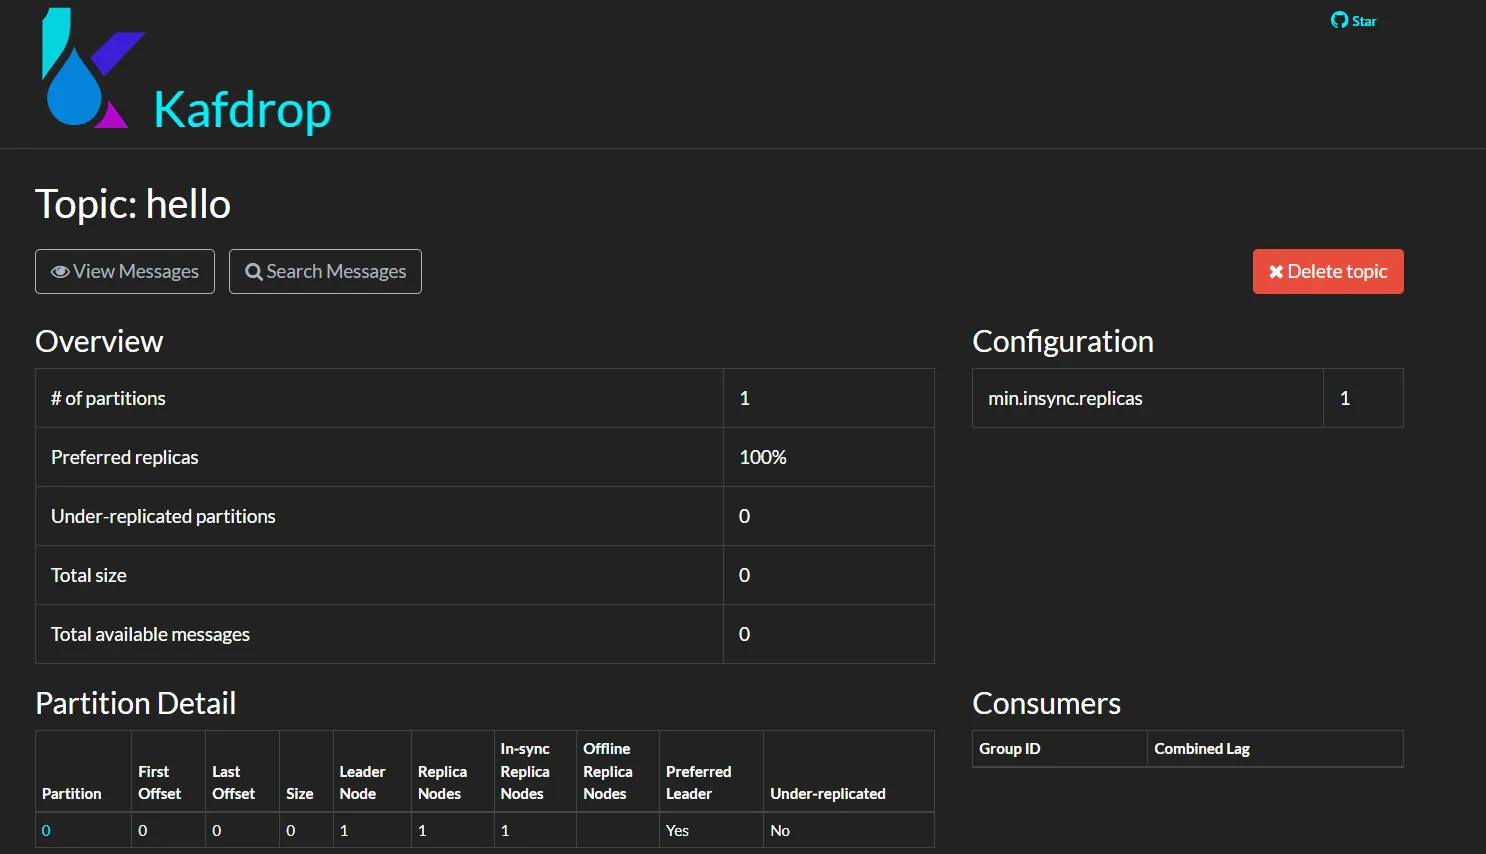
 4. Topic 详细信息
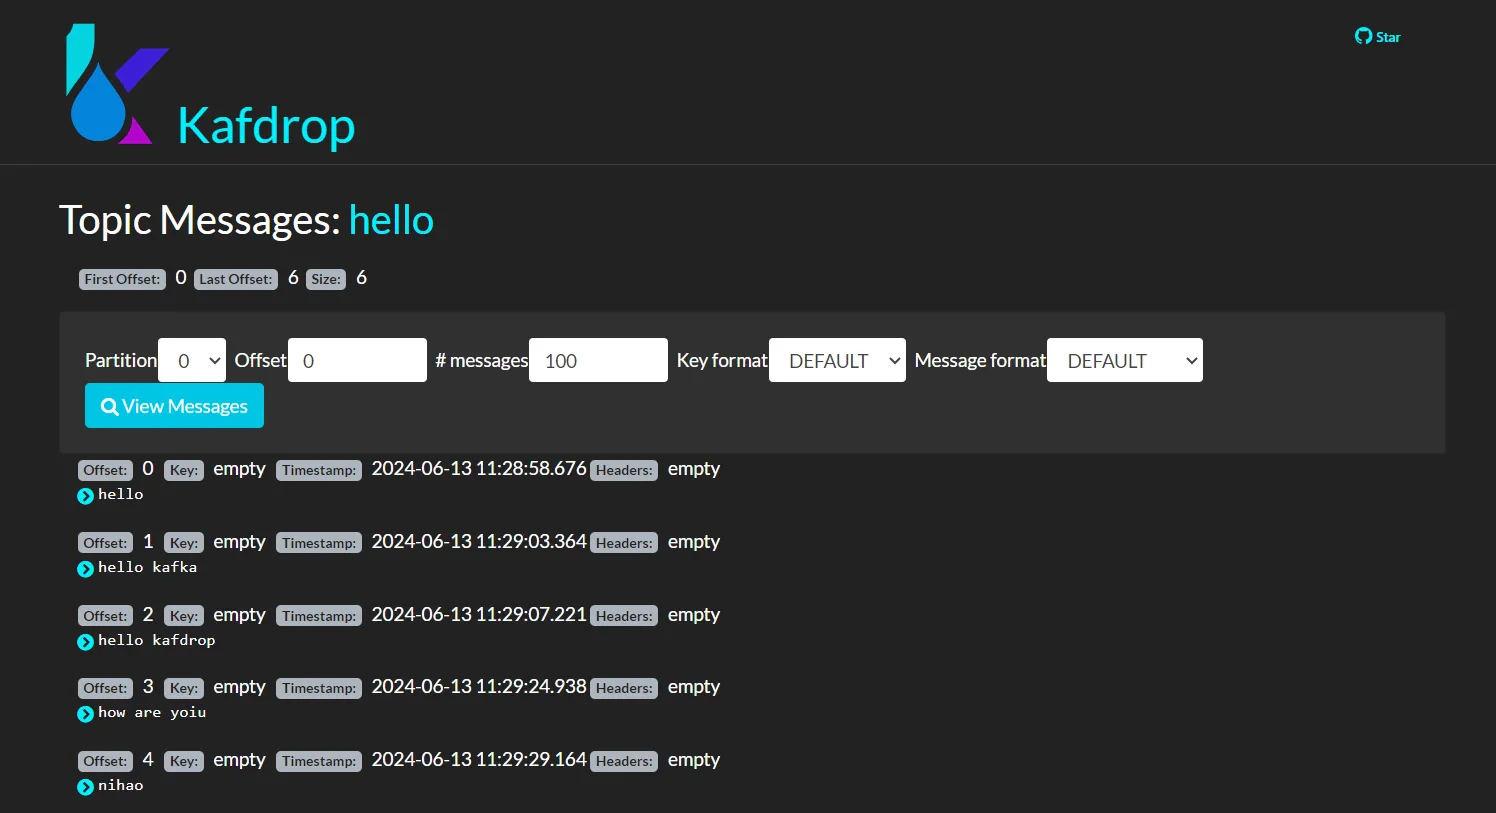
 5. Topic 下的消息信息
 ## 总结
本教程探索了 Kafdrop 的关键特性、功能以及与 AutoMQ 集群集成的方法,展示了如何轻松地监控和管理 AutoMQ 集群。Kafdrop 的使用不仅能够帮助团队更好地理解和控制他们的数据流,还能够提升开发和运维效率,确保数据处理流程的高效稳定。希望本教程能够为你在使用 Kafdrop 与 AutoMQ 集群时提供有价值的见解和帮助。
## 引用
\[1] Kafdrop: [https://github.com/obsidiandynamics/kafdrop](https://github.com/obsidiandynamics/kafdrop)
\[2] 在 Linux 主机上以集群方式部署 | AutoMQ: [https://docs.automq.com/zh/automq/getting-started/cluster-deployment-on-linux](https://docs.automq.com/zh/automq/getting-started/cluster-deployment-on-linux)
\[3] Kafdrop 部署方式:[https://github.com/obsidiandynamics/kafdrop/blob/master/README.md#getting-started](https://github.com/obsidiandynamics/kafdrop/blob/master/README.md#getting-started)
\[4] Kafdrop 项目仓库:[https://github.com/obsidiandynamics/kafdrop](https://github.com/obsidiandynamics/kafdrop)
## 总结
本教程探索了 Kafdrop 的关键特性、功能以及与 AutoMQ 集群集成的方法,展示了如何轻松地监控和管理 AutoMQ 集群。Kafdrop 的使用不仅能够帮助团队更好地理解和控制他们的数据流,还能够提升开发和运维效率,确保数据处理流程的高效稳定。希望本教程能够为你在使用 Kafdrop 与 AutoMQ 集群时提供有价值的见解和帮助。
## 引用
\[1] Kafdrop: [https://github.com/obsidiandynamics/kafdrop](https://github.com/obsidiandynamics/kafdrop)
\[2] 在 Linux 主机上以集群方式部署 | AutoMQ: [https://docs.automq.com/zh/automq/getting-started/cluster-deployment-on-linux](https://docs.automq.com/zh/automq/getting-started/cluster-deployment-on-linux)
\[3] Kafdrop 部署方式:[https://github.com/obsidiandynamics/kafdrop/blob/master/README.md#getting-started](https://github.com/obsidiandynamics/kafdrop/blob/master/README.md#getting-started)
\[4] Kafdrop 项目仓库:[https://github.com/obsidiandynamics/kafdrop](https://github.com/obsidiandynamics/kafdrop)