> ## Documentation Index
> Fetch the complete documentation index at: https://docs.automq.com/llms.txt
> Use this file to discover all available pages before exploring further.
# Table Topic 快速开始
> AutoMQ’s Table Topic seamlessly integrates streaming data with static data lakes, solving traditional ETL challenges, with quick deployment via Docker.
Table Topic 是 AutoMQ 面向现代数据湖架构设计的核心功能,其核心作用在于实现流式数据与静态数据湖的无缝集成,通过架构创新解决传统流批分离、ETL 复杂、成本高昂等问题。本文档面向首次体验 AutoMQ 的新用户,重点介绍如何在本地开发环境中部署支持 Table Topic 的 AutoMQ集群(通过部署 MinIO 提供对象存储服务),用户快速体验 Table Topic 的特性功能。
本文档仅适用于测试和学习场景,生产环境使用 Table Topic 功能,请参考[Linux 主机部署多节点集群▸](/zh/automq/deployment/deploy-multi-nodes-cluster-on-linux)等部署文档。
## 前置条件
* Linux/Mac/Windows Subsystem for Linux
* Docker
* Docker Compose 版本 > 2.22.0
* 8GB 以上空闲内存
## 安装并启动 AutoMQ 集群
输入下方命令即可下载单节点部署方案的 docker-compose 配置文件,并通过 Docker Compose 启动单节点的 AutoMQ 集群。
```bash theme={null}
curl -O https://raw.githubusercontent.com/AutoMQ/automq/refs/tags/1.5.5/docker/table_topic/docker-compose.yml && docker-compose up -d
```
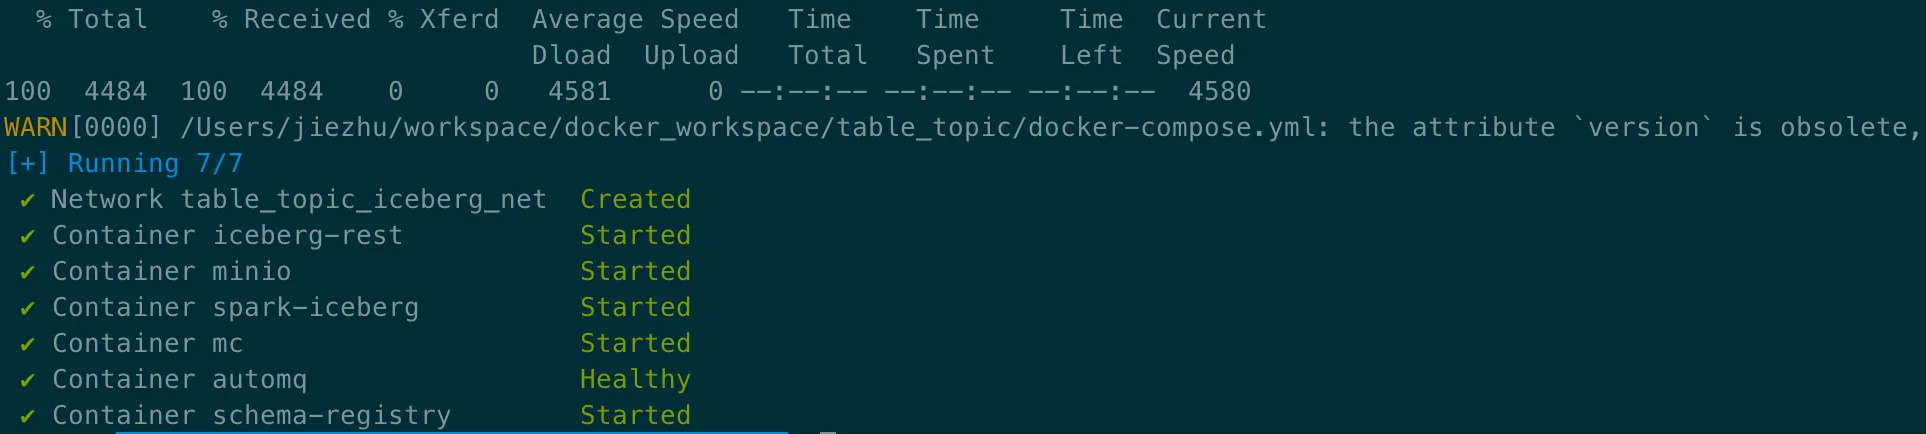
启动成功后,我们将通过发送 Table Topic消息、Spark sql进行查询,来体验表自动创建、表查询和更新、Schema 变更、数据分区和 CDC 的能力。用户可以在浏览器中打开 [http://localhost:8888](http://localhost:8888) 通过 Jupyter Notebook 逐步点击执行进行自助体验。
 ## 创建表
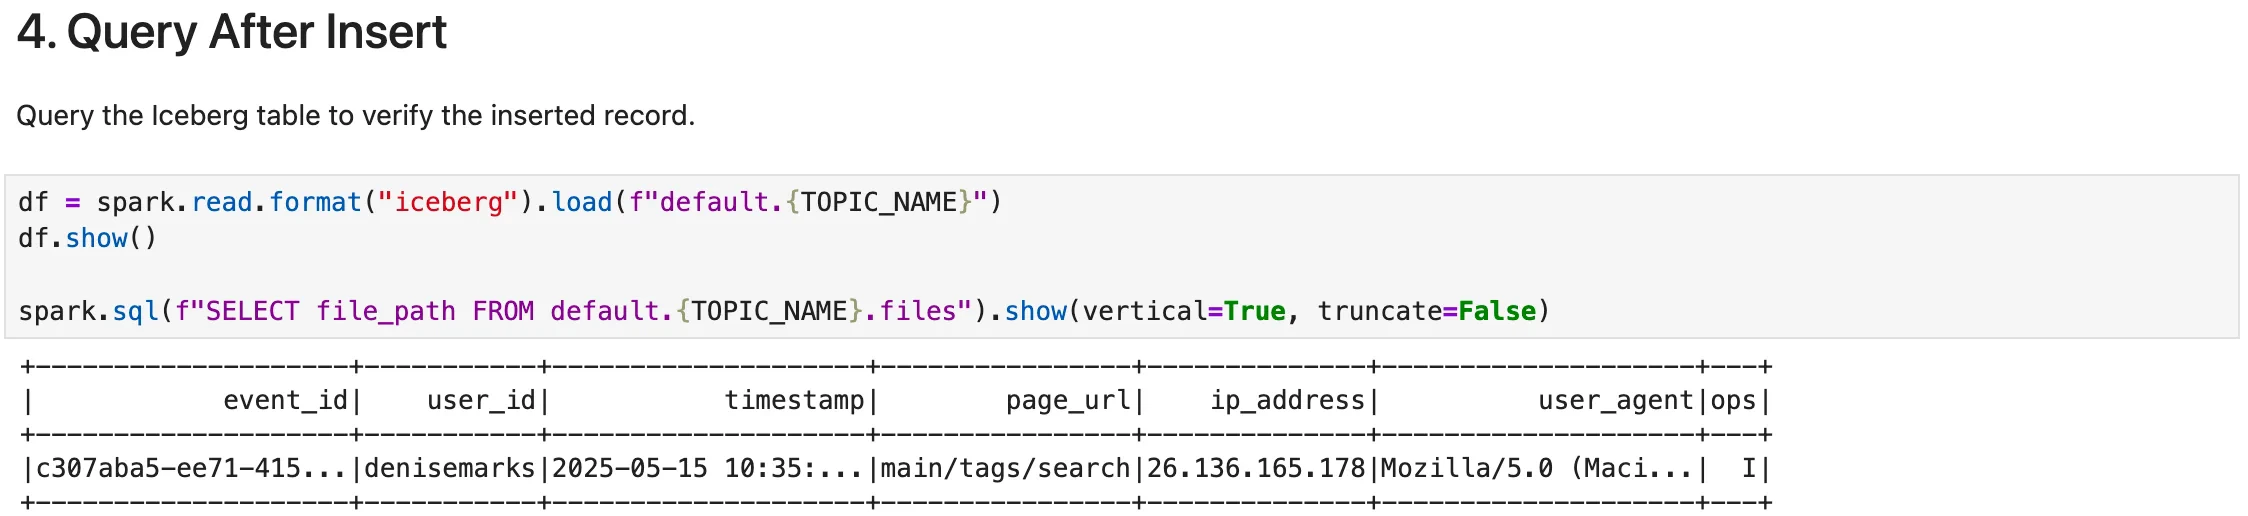
NoteBook 中的前三步完成 Table Topic 创建、已经写入一条消息数据并触发生成 Iceberg 表的生成。
## 创建表
NoteBook 中的前三步完成 Table Topic 创建、已经写入一条消息数据并触发生成 Iceberg 表的生成。
 ## 查询数据
 **注意:**
从消息写入到数据入表,存在一定延迟,如果查询出现报错,建议稍后再次重试查询。
## 更新记录
**注意:**
从消息写入到数据入表,存在一定延迟,如果查询出现报错,建议稍后再次重试查询。
## 更新记录
 查询更新结果,数据 `ops` 从 `I` 变成了 `U` 。
 ## 删除数据
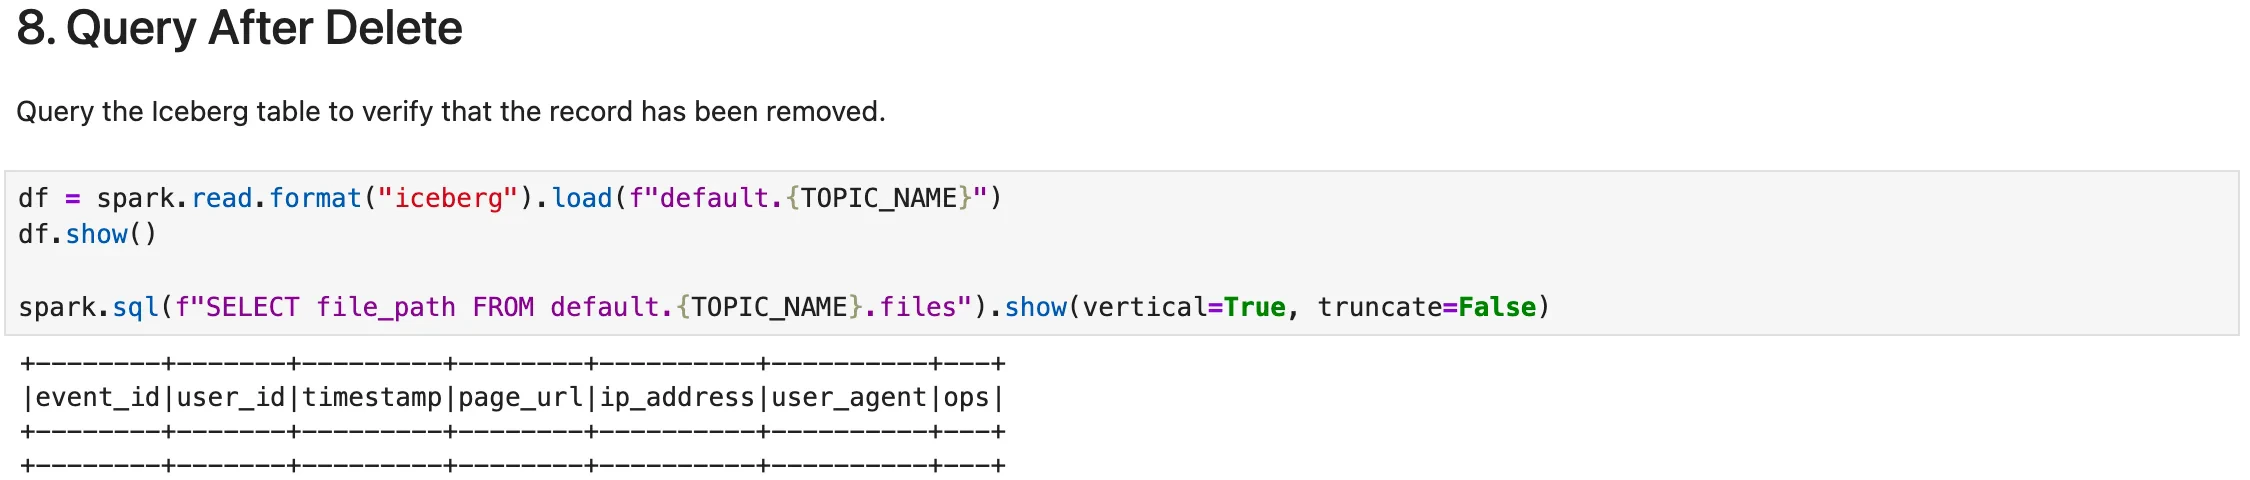
 查询删除结果,记录变为空。
 ## 删除表
 ## 停止并卸载 AutoMQ 集群
完成功能测试后,请运行以下命令以停止和卸载当前 AutoMQ 集群。
```bash theme={null}
curl -O https://raw.githubusercontent.com/AutoMQ/automq/refs/tags/1.5.0/docker/table_topic/docker-compose.yml && docker-compose down -v
```
详细参数配置请参见 [Table Topic 配置▸](/zh/automq/table-topic/table-topic-configuration) 章节。
## 停止并卸载 AutoMQ 集群
完成功能测试后,请运行以下命令以停止和卸载当前 AutoMQ 集群。
```bash theme={null}
curl -O https://raw.githubusercontent.com/AutoMQ/automq/refs/tags/1.5.0/docker/table_topic/docker-compose.yml && docker-compose down -v
```
详细参数配置请参见 [Table Topic 配置▸](/zh/automq/table-topic/table-topic-configuration) 章节。