Kafdrop
Introduction
Kafdrop [1] is an elegant, intuitive, and robust web UI tool tailored for Apache Kafka®. It enables developers and administrators to effortlessly view and manage vital metadata of Kafka clusters, such as topics, partitions, consumer groups, and their offsets. By providing a user-friendly interface, Kafdrop significantly streamlines the monitoring and management of Kafka clusters, enabling users to swiftly access cluster status information without depending on complex command-line tools.
Thanks to AutoMQ's full compatibility with Apache Kafka®, it integrates seamlessly with Kafdrop. By using Kafdrop, AutoMQ users can also benefit from an intuitive user interface and real-time monitoring of Kafka cluster status, including topics, partitions, consumer groups, and their critical metadata offsets. This monitoring feature not only enhances the efficiency of problem diagnosis but also aids in optimizing cluster performance and resource utilization.
This tutorial will guide you through starting the Kafdrop service and using it alongside your AutoMQ cluster to monitor and manage the cluster's status.

Prerequisites
Kafdrop environment: AutoMQ cluster along with JDK17 and Maven 3.6.3 or higher.
Kafdrop can be run through a JAR file, deployed using Docker, or via protobuf. For more details, refer to the official documentation [3].
Prepare 5 hosts for deploying the AutoMQ cluster. It is recommended to use Linux amd64 hosts with 2 cores and 16GB of memory, and prepare two virtual storage volumes. The example is as follows:
Role IP Node ID System Volume Data Volume CONTROLLER 192.168.0.1 0 EBS 20GB EBS 20GB CONTROLLER 192.168.0.2 1 EBS 20GB EBS 20GB CONTROLLER 192.168.0.3 2 EBS 20GB EBS 20GB BROKER 192.168.0.4 3 EBS 20GB EBS 20GB BROKER 192.168.0.5 4 EBS 20GB EBS 20GB Tips:
Ensure that these machines are within the same subnet and have connectivity between them
In non-production settings, it's sufficient to deploy a single Controller, which inherently assumes the broker role by default
Download the most recent official binary package from AutoMQ Github Releases for installing AutoMQ.
Next, I will proceed to set up the AutoMQ cluster and then initiate Kafdrop.
Install and Initiate the AutoMQ Cluster
Set up S3URL
Step 1: Generate S3 URL
AutoMQ offers the automq-kafka-admin.sh tool for quick initialization. Simply provide an S3 URL with the necessary access points and authentication details to start AutoMQ with a single click, eliminating the need for manual cluster ID creation or storage configuration.
### Command Line Usage Example
bin/automq-kafka-admin.sh generate-s3-url \
--s3-access-key=xxx \
--s3-secret-key=yyy \
--s3-region=cn-northwest-1 \
--s3-endpoint=s3.cn-northwest-1.amazonaws.com.cn \
--s3-data-bucket=automq-data \
--s3-ops-bucket=automq-ops
Note: An AWS S3 bucket must be set up beforehand. If errors occur, verify the accuracy of the parameters and their formats.
Output Results
When the command is executed, the process unfolds automatically through these steps:
Perform an initial check of S4's basic features using the supplied accessKey and secretKey to ensure AutoMQ is compatible with S3.
Create an s3url using the provided identity details and access point information.
Fetch the command example to launch AutoMQ using the s3url. In the command, substitute
--controller-listand--broker-listwith the actual CONTROLLER and BROKER details to be deployed.
Example execution results are as follows:
############ Ping S3 ########################

[ OK ] Write s3 object
[ OK ] Read s3 object
[ OK ] Delete s3 object
[ OK ] Write s3 object
[ OK ] Upload s3 multipart object
[ OK ] Read s3 multipart object
[ OK ] Delete s3 object
############ String of S3url ################

Your s3url is:

s3://s3.cn-northwest-1.amazonaws.com.cn?s3-access-key=xxx&s3-secret-key=yyy&s3-region=cn-northwest-1&s3-endpoint-protocol=https&s3-data-bucket=automq-data&s3-path-style=false&s3-ops-bucket=automq-ops&cluster-id=40ErA_nGQ_qNPDz0uodTEA


############ Usage of S3url ################
To start AutoMQ, generate the start commandline using s3url.
bin/automq-kafka-admin.sh generate-start-command \
--s3-url="s3://s3.cn-northwest-1.amazonaws.com.cn?s3-access-key=XXX&s3-secret-key=YYY&s3-region=cn-northwest-1&s3-endpoint-protocol=https&s3-data-bucket=automq-data&s3-path-style=false&s3-ops-bucket=automq-ops&cluster-id=40ErA_nGQ_qNPDz0uodTEA" \
--controller-list="192.168.0.1:9093;192.168.0.2:9093;192.168.0.3:9093"  \
--broker-list="192.168.0.4:9092;192.168.0.5:9092"

TIPS: Please replace the controller-list and broker-list with your actual IP addresses.
Step 2: Generate a List of Startup Commands
Replace --controller-list and --broker-list in the commands generated in the previous step with your host information, specifically, replace them with the IP addresses of the 3 CONTROLLERS and 2 BROKERS mentioned in the environment preparation, using the default ports 9092 and 9093.
bin/automq-kafka-admin.sh generate-start-command \
--s3-url="s3://s3.cn-northwest-1.amazonaws.com.cn?s3-access-key=XXX&s3-secret-key=YYY&s3-region=cn-northwest-1&s3-endpoint-protocol=https&s3-data-bucket=automq-data&s3-path-style=false&s3-ops-bucket=automq-ops&cluster-id=40ErA_nGQ_qNPDz0uodTEA" \
--controller-list="192.168.0.1:9093;192.168.0.2:9093;192.168.0.3:9093"  \
--broker-list="192.168.0.4:9092;192.168.0.5:9092"
Parameter Explanation
| Parameter Name | Required | Description |
|---|---|---|
| --s3-url | Yes | Generated by the bin/automq-kafka-admin.sh generate-s3-url command line tool, includes authentication, cluster ID, etc. |
| --controller-list | Yes | At least one address is needed, used as the IP and port list for the CONTROLLER hosts. Format: IP1:PORT1; IP2:PORT2; IP3:PORT3 |
| --broker-list | Yes | At least one address is needed, used as the IP and port list for the BROKER hosts. Format: IP1:PORT1; IP2:PORT2; IP3:PORT3 |
| --controller-only-mode | No | Determines if the CONTROLLER node exclusively assumes the role of CONTROLLER. The default is false, meaning the deployed CONTROLLER node also serves as a BROKER. |
Output
After the command is executed, it generates a list of commands for starting AutoMQ.
############ Start Commandline ##############
To start an AutoMQ Kafka server, please navigate to the directory where your AutoMQ tgz file is located and run the following command.

Before running the command, make sure that Java 17 is installed on your host. You can verify the Java version by executing 'java -version'.

bin/kafka-server-start.sh --s3-url="s3://s3.cn-northwest-1.amazonaws.com.cn?s3-access-key=XXX&s3-secret-key=YYY&s3-region=cn-northwest-1&s3-endpoint-protocol=https&s3-data-bucket=automq-data&s3-path-style=false&s3-ops-bucket=automq-ops&cluster-id=40ErA_nGQ_qNPDz0uodTEA" --override process.roles=broker,controller --override node.id=0 --override controller.quorum.voters=0@192.168.0.1:9093,1@192.168.0.2:9093,2@192.168.0.3:9093 --override listeners=PLAINTEXT://192.168.0.1:9092,CONTROLLER://192.168.0.1:9093 --override advertised.listeners=PLAINTEXT://192.168.0.1:9092

bin/kafka-server-start.sh --s3-url="s3://s3.cn-northwest-1.amazonaws.com.cn?s3-access-key=XXX&s3-secret-key=YYY&s3-region=cn-northwest-1&s3-endpoint-protocol=https&s3-data-bucket=automq-data&s3-path-style=false&s3-ops-bucket=automq-ops&cluster-id=40ErA_nGQ_qNPDz0uodTEA" --override process.roles=broker,controller --override node.id=1 --override controller.quorum.voters=0@192.168.0.1:9093,1@192.168.0.2:9093,2@192.168.0.3:9093 --override listeners=PLAINTEXT://192.168.0.2:9092,CONTROLLER://192.168.0.2:9093 --override advertised.listeners=PLAINTEXT://192.168.0.2:9092

bin/kafka-server-start.sh --s3-url="s3://s3.cn-northwest-1.amazonaws.com.cn?s3-access-key=XXX&s3-secret-key=YYY&s3-region=cn-northwest-1&s3-endpoint-protocol=https&s3-data-bucket=automq-data&s3-path-style=false&s3-ops-bucket=automq-ops&cluster-id=40ErA_nGQ_qNPDz0uodTEA" --override process.roles=broker,controller --override node.id=2 --override controller.quorum.voters=0@192.168.0.1:9093,1@192.168.0.2:9093,2@192.168.0.3:9093 --override listeners=PLAINTEXT://192.168.0.3:9092,CONTROLLER://192.168.0.3:9093 --override advertised.listeners=PLAINTEXT://192.168.0.3:9092

bin/kafka-server-start.sh --s3-url="s3://s3.cn-northwest-1.amazonaws.com.cn?s3-access-key=XXX&s3-secret-key=YYY&s3-region=cn-northwest-1&s3-endpoint-protocol=https&s3-data-bucket=automq-data&s3-path-style=false&s3-ops-bucket=automq-ops&cluster-id=40ErA_nGQ_qNPDz0uodTEA" --override process.roles=broker --override node.id=3 --override controller.quorum.voters=0@192.168.0.1:9093,1@192.168.0.2:9093,2@192.168.0.3:9093 --override listeners=PLAINTEXT://192.168.0.4:9092 --override advertised.listeners=PLAINTEXT://192.168.0.4:9092

bin/kafka-server-start.sh --s3-url="s3://s3.cn-northwest-1.amazonaws.com.cn?s3-access-key=XXX&s3-secret-key=YYY&s3-region=cn-northwest-1&s3-endpoint-protocol=https&s3-data-bucket=automq-data&s3-path-style=false&s3-ops-bucket=automq-ops&cluster-id=40ErA_nGQ_qNPDz0uodTEA" --override process.roles=broker --override node.id=4 --override controller.quorum.voters=0@192.168.0.1:9093,1@192.168.0.2:9093,2@192.168.0.3:9093 --override listeners=PLAINTEXT://192.168.0.5:9092 --override advertised.listeners=PLAINTEXT://192.168.0.5:9092


TIPS: Start controllers first and then the brokers.
Note: By default, node.id starts from 0 and is auto-generated.
Step 3: Starting AutoMQ
To initiate the cluster, execute the commands sequentially from the command list generated in the previous step on the designated CONTROLLER or BROKER host. For instance, to start the first CONTROLLER process at 192.168.0.1, use the first command template from the list.
bin/kafka-server-start.sh --s3-url="s3://s3.cn-northwest-1.amazonaws.com.cn?s3-access-key=XXX&s3-secret-key=YYY&s3-region=cn-northwest-1&s3-endpoint-protocol=https&s3-data-bucket=automq-data&s3-path-style=false&s3-ops-bucket=automq-ops&cluster-id=40ErA_nGQ_qNPDz0uodTEA" --override process.roles=broker,controller --override node.id=0 --override controller.quorum.voters=0@192.168.0.1:9093,1@192.168.0.2:9093,2@192.168.0.3:9093 --override listeners=PLAINTEXT://192.168.0.1:9092,CONTROLLER://192.168.0.1:9093 --override advertised.listeners=PLAINTEXT://192.168.0.1:9092
Parameter Description
When initiating the startup command, any parameters that are not specified will default to Apache Kafka's default configurations. For new parameters introduced by AutoMQ, the default values of AutoMQ will apply. To customize the configurations, additional --override key=value parameters can be appended at the end of the command.
| Parameter Name | Required | Description |
|---|---|---|
| s3-url | Yes | Generated by the command line tool bin/automq-kafka-admin.sh generate-s3-url, containing authentication details and cluster ID. |
| process.roles | Yes | Options include CONTROLLER or BROKER. If a host serves as both CONTROLLER and BROKER, the configuration value should be CONTROLLER, BROKER. |
| node.id | Yes | An integer uniquely identifying a BROKER or CONTROLLER within a Kafka cluster; it must remain unique throughout the cluster. |
| controller.quorum.voters | Yes | Host information participating in KRAFT elections, including nodeid, ip, and port, e.g., 0@192.168.0.1:9093, 1@192.168.0.2:9093, 2@192.168.0.3:9093 |
| listeners | Yes | IP and port being listened to. |
| advertised.listeners | Yes | The access address provided by the BROKER for Clients. |
| log.dirs | No | Directory where KRAFT and BROKER metadata are stored. |
| s3.wal.path | No | In production environments, it is recommended to store AutoMQ WAL data on a newly mounted separate raw device. This enhances performance as AutoMQ supports writing data directly to raw devices, thereby reducing latency. Ensure the correct path is configured for storing WAL data. |
| autobalancer.controller.enable | No | Default value is false, which means self-balancing is not enabled. Once self-balancing is activated, AutoMQ's auto balancer component will automatically reassign partitions to ensure overall traffic is balanced. |
Tips:
- If continuous self-balancing is needed or to run Example: Self-Balancing When Cluster Nodes Change, it's recommended to explicitly set the parameter --override autobalancer.controller.enable=true during startup.
Background Execution
To execute in the background, append the following code at the end of the command:
command > /dev/null 2>&1 &
Starting Kafdrop Service
In the steps described above, we've established an AutoMQ cluster and determined the listening addresses and ports for all broker nodes. Next, we will proceed to launch the Kafdrop service.
Note: Ensure that the Kafdrop service location has access to the AutoMQ cluster to prevent connection timeouts and other potential issues.
In this example, I demonstrate how to launch the Kafdrop service using a JAR file. Here are the steps involved:
- Clone the Kafdrop repository source code: Kafdrop github [4]
git clone https://github.com/obsidiandynamics/kafdrop.git
- Compile and package Kafdrop locally using Maven. Run this command in the root directory:
mvn clean compile package
- To initiate the service, you must define the address and port of the AutoMQ cluster brokers:
java --add-opens=java.base/sun.nio.ch=ALL-UNNAMED \
    -jar target/kafdrop-<version>.jar \
    --kafka.brokerConnect=<host:port,host:port>,...
Replace kafdrop-\<version>.jar with the actual version, for example, kafdrop-4.0.2-SNAPSHOT.jar.
Use --kafka.brokerConnect=\<host:port,host:port> to set the host and port for the specific cluster broker nodes.
Here's what the console startup looks like:
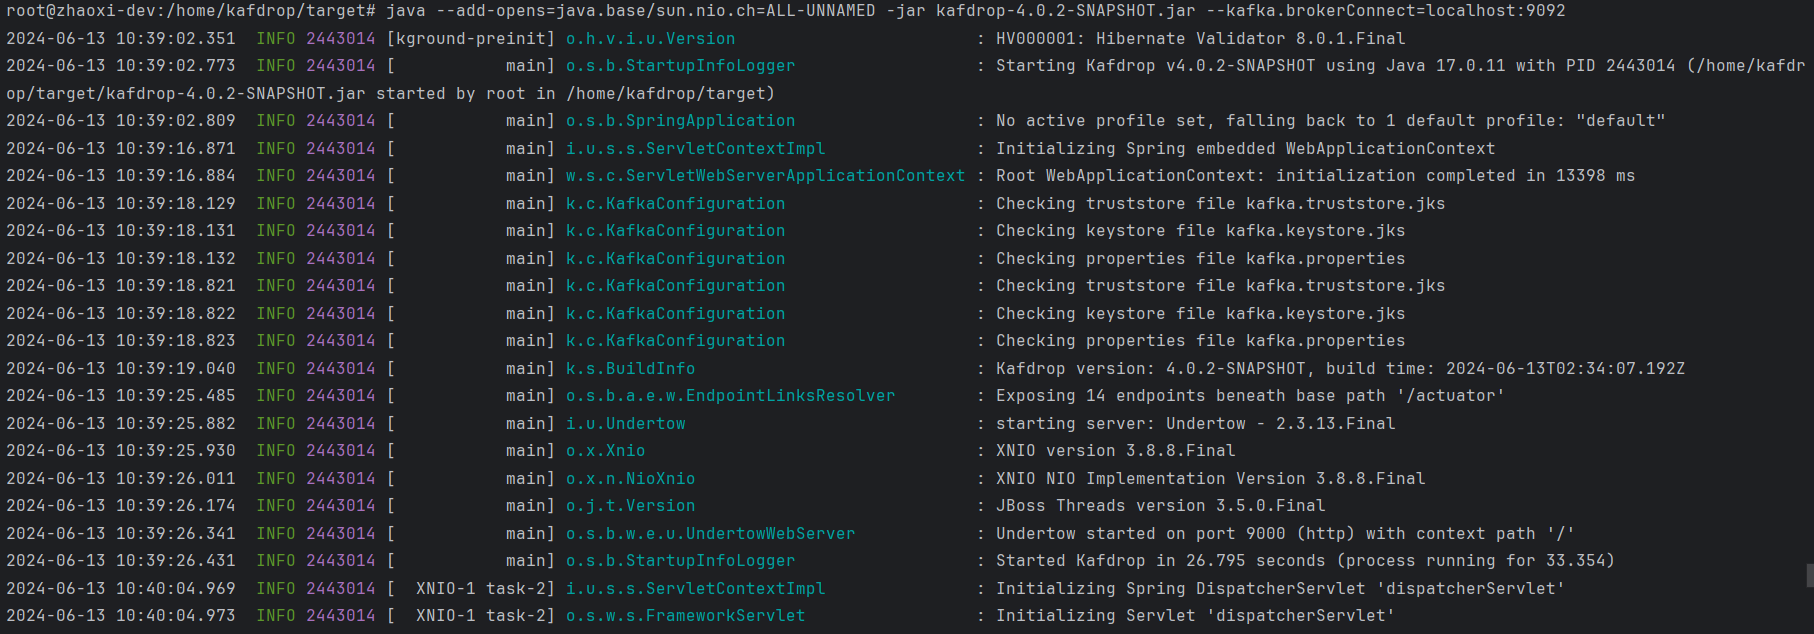
If not specified, the kafka.brokerConnect defaults to localhost:9092.
Note: As of Kafdrop 3.10.0, a ZooKeeper connection is no longer necessary. All essential cluster details are now accessed through the Kafka management API.
Open your browser and go to http://localhost:9000. To use a different port, apply the following configuration:
--server.port=<port> --management.server.port=<port>
Final Interface
- Complete Interface
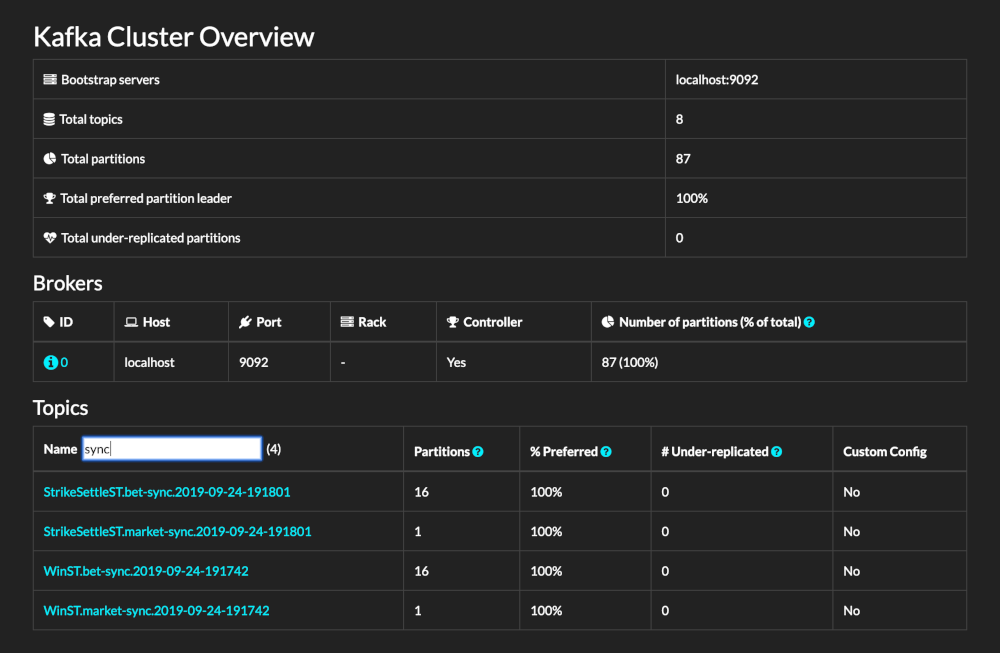
This displays the number of partitions, number of Topics, and additional cluster status details.
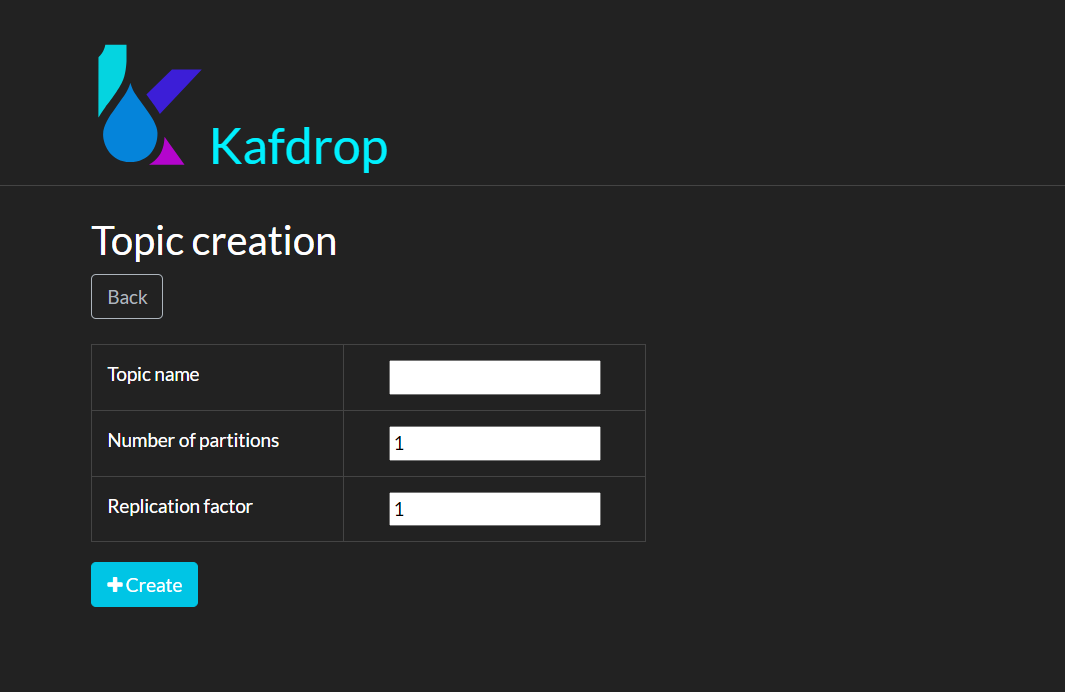
- Create Topic Feature
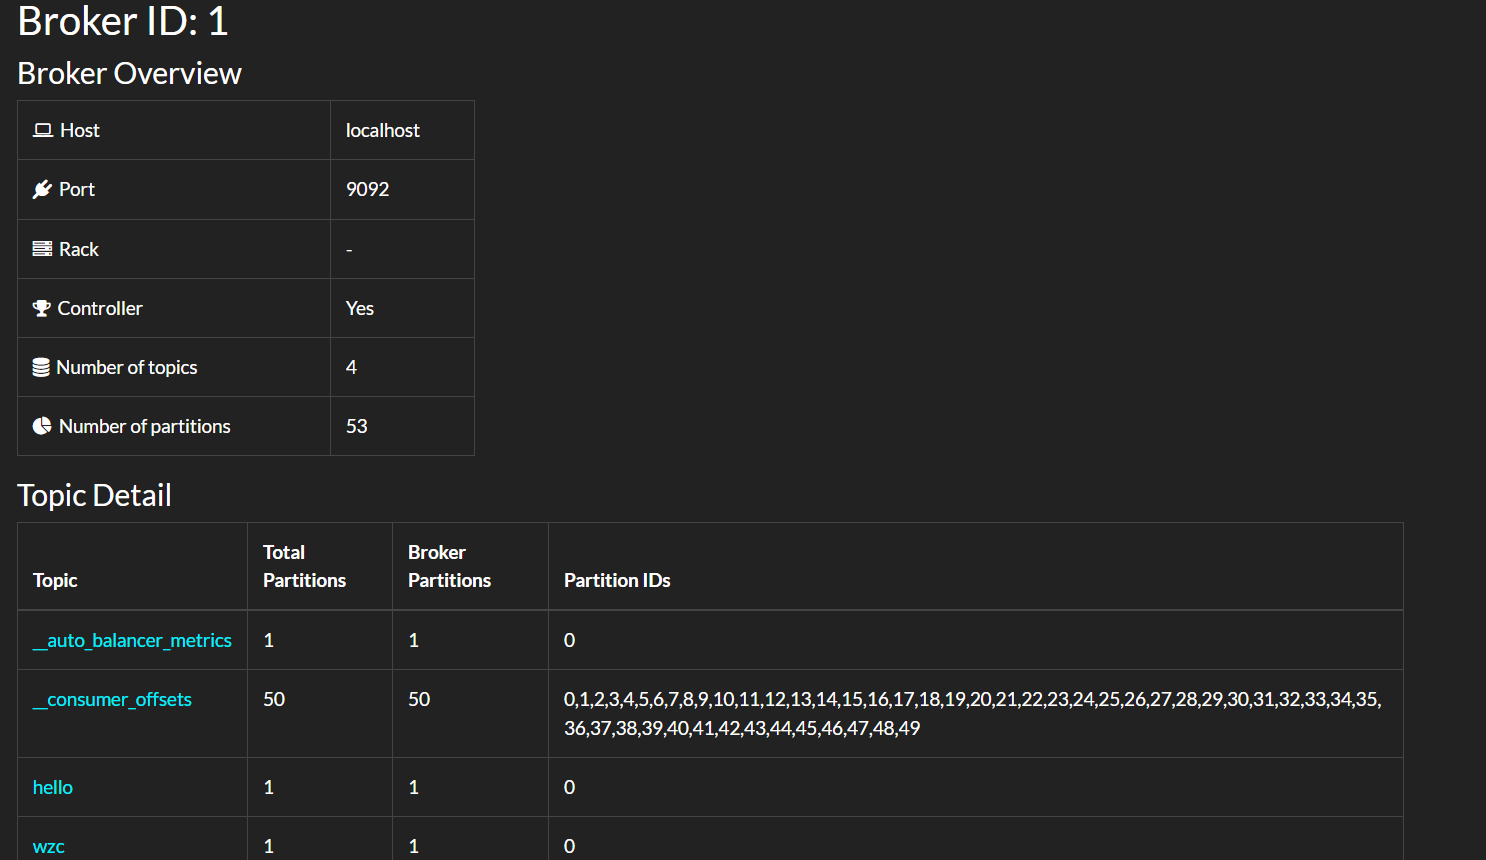
- Detailed broker node information
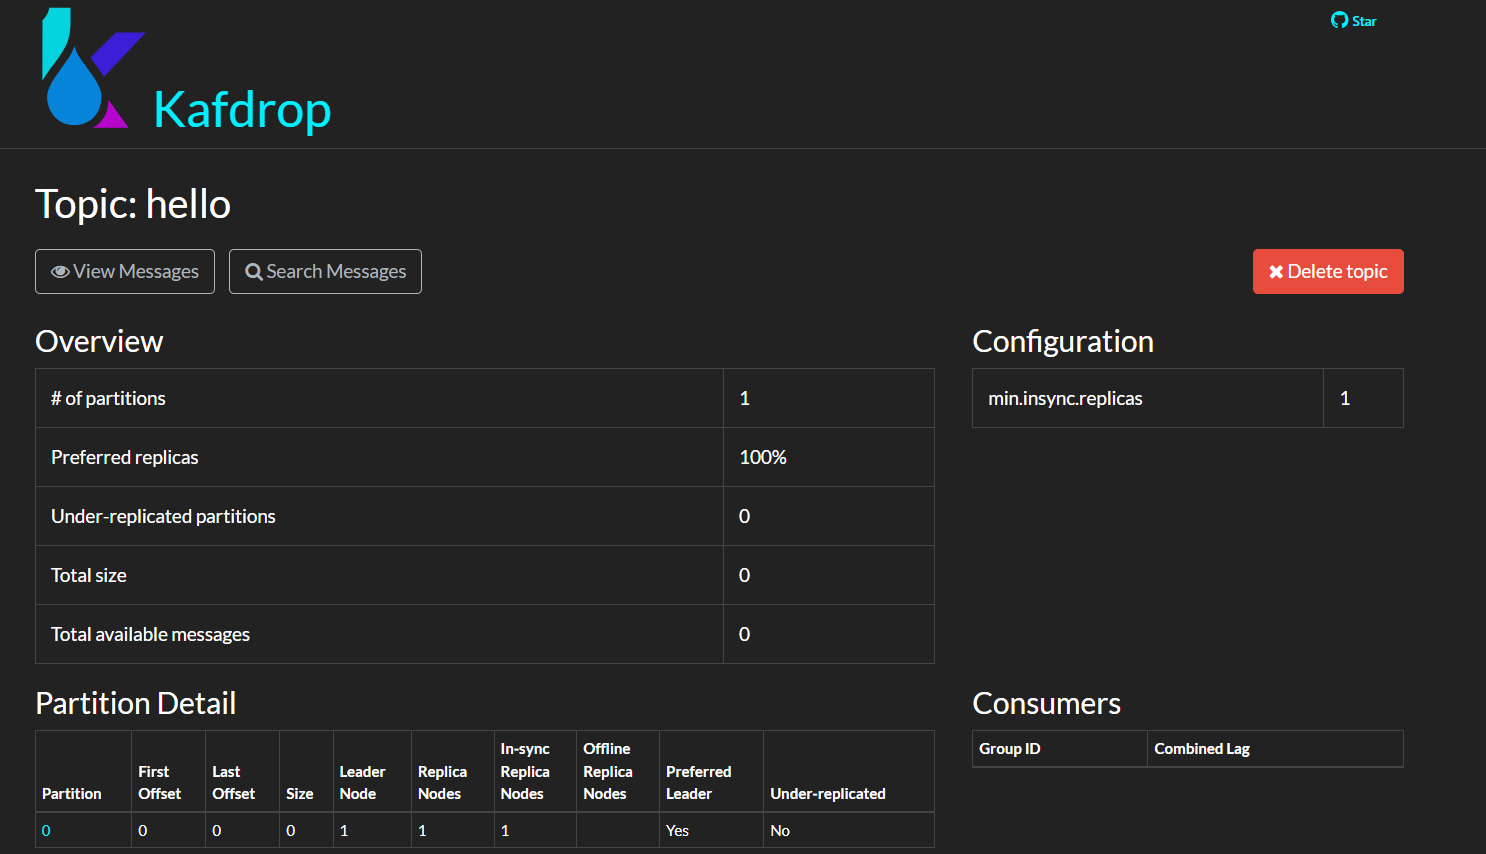
- Detailed Topic information
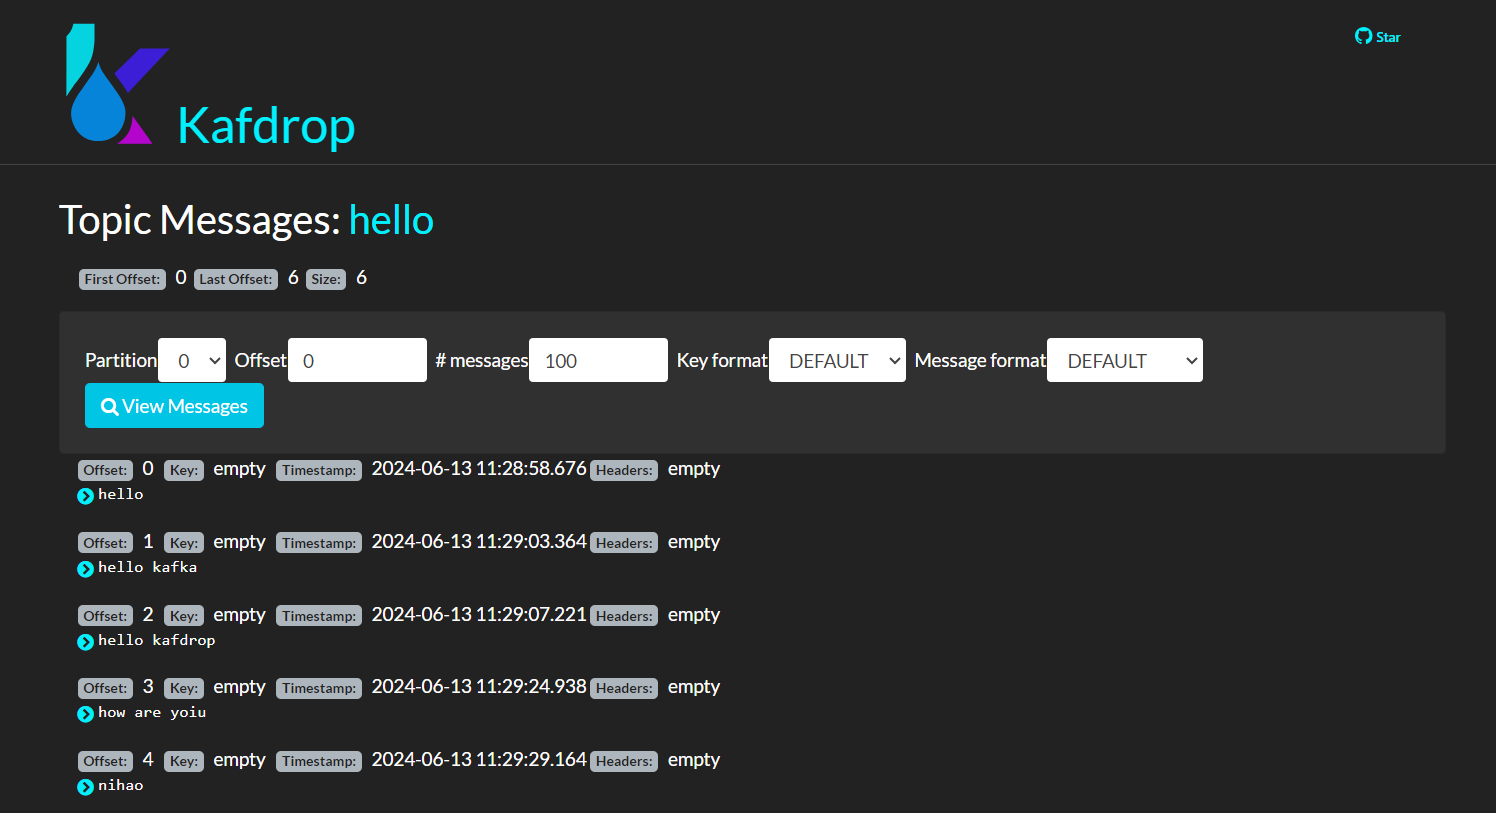
Message information under Topic
Summary
Through this tutorial, we've delved into the essential features, functionalities, and integration techniques for AutoMQ clusters using Kafdrop, illustrating how to efficiently monitor and manage AutoMQ clusters. Kafdrop's functionality not only helps teams gain a better grasp and control of their data streams but also boosts development and operational efficiencies, ensuring robust and stable data management. We hope this tutorial offers valuable insights and guidance for using Kafdrop with your AutoMQ clusters.
Reference
[1] Kafdrop: https://github.com/obsidiandynamics/kafdrop
[2] AutoMQ: https://www.automq.com/zh
[3] Kafdrop deployment method: https://github.com/obsidiandynamics/kafdrop/blob/master/README.md\#getting-started
[4] Kafdrop project repository: https://github.com/obsidiandynamics/kafdrop