Experience AutoMQ for Kafka
After completing the environment setup and related initialization, this article explains how to quickly create a Kafka instance and experience message sending and receiving.
In this article, the terms AutoMQ product service provider, AutoMQ service provider, and AutoMQ all specifically refer to AutoMQ HK Limited.
Prerequisites
Before creating a Kafka instance, you need to meet the prerequisites and ensure that the environment setup is complete. If not, refer to the operations here:
Create Instance
To experience AutoMQ for Kafka, you first need to create an instance. Each instance can correspond to an open-source Apache Kafka cluster. Users create instances through the front-end interface of the environment console, and the back-end of the console will create the underlying cloud resources and complete the software deployment of the instance on behalf of the user.
The steps are as follows:
Visit the environment console URL and enter the environment console.
Enter the environment console, click the left navigation bar, and go to the instance list.
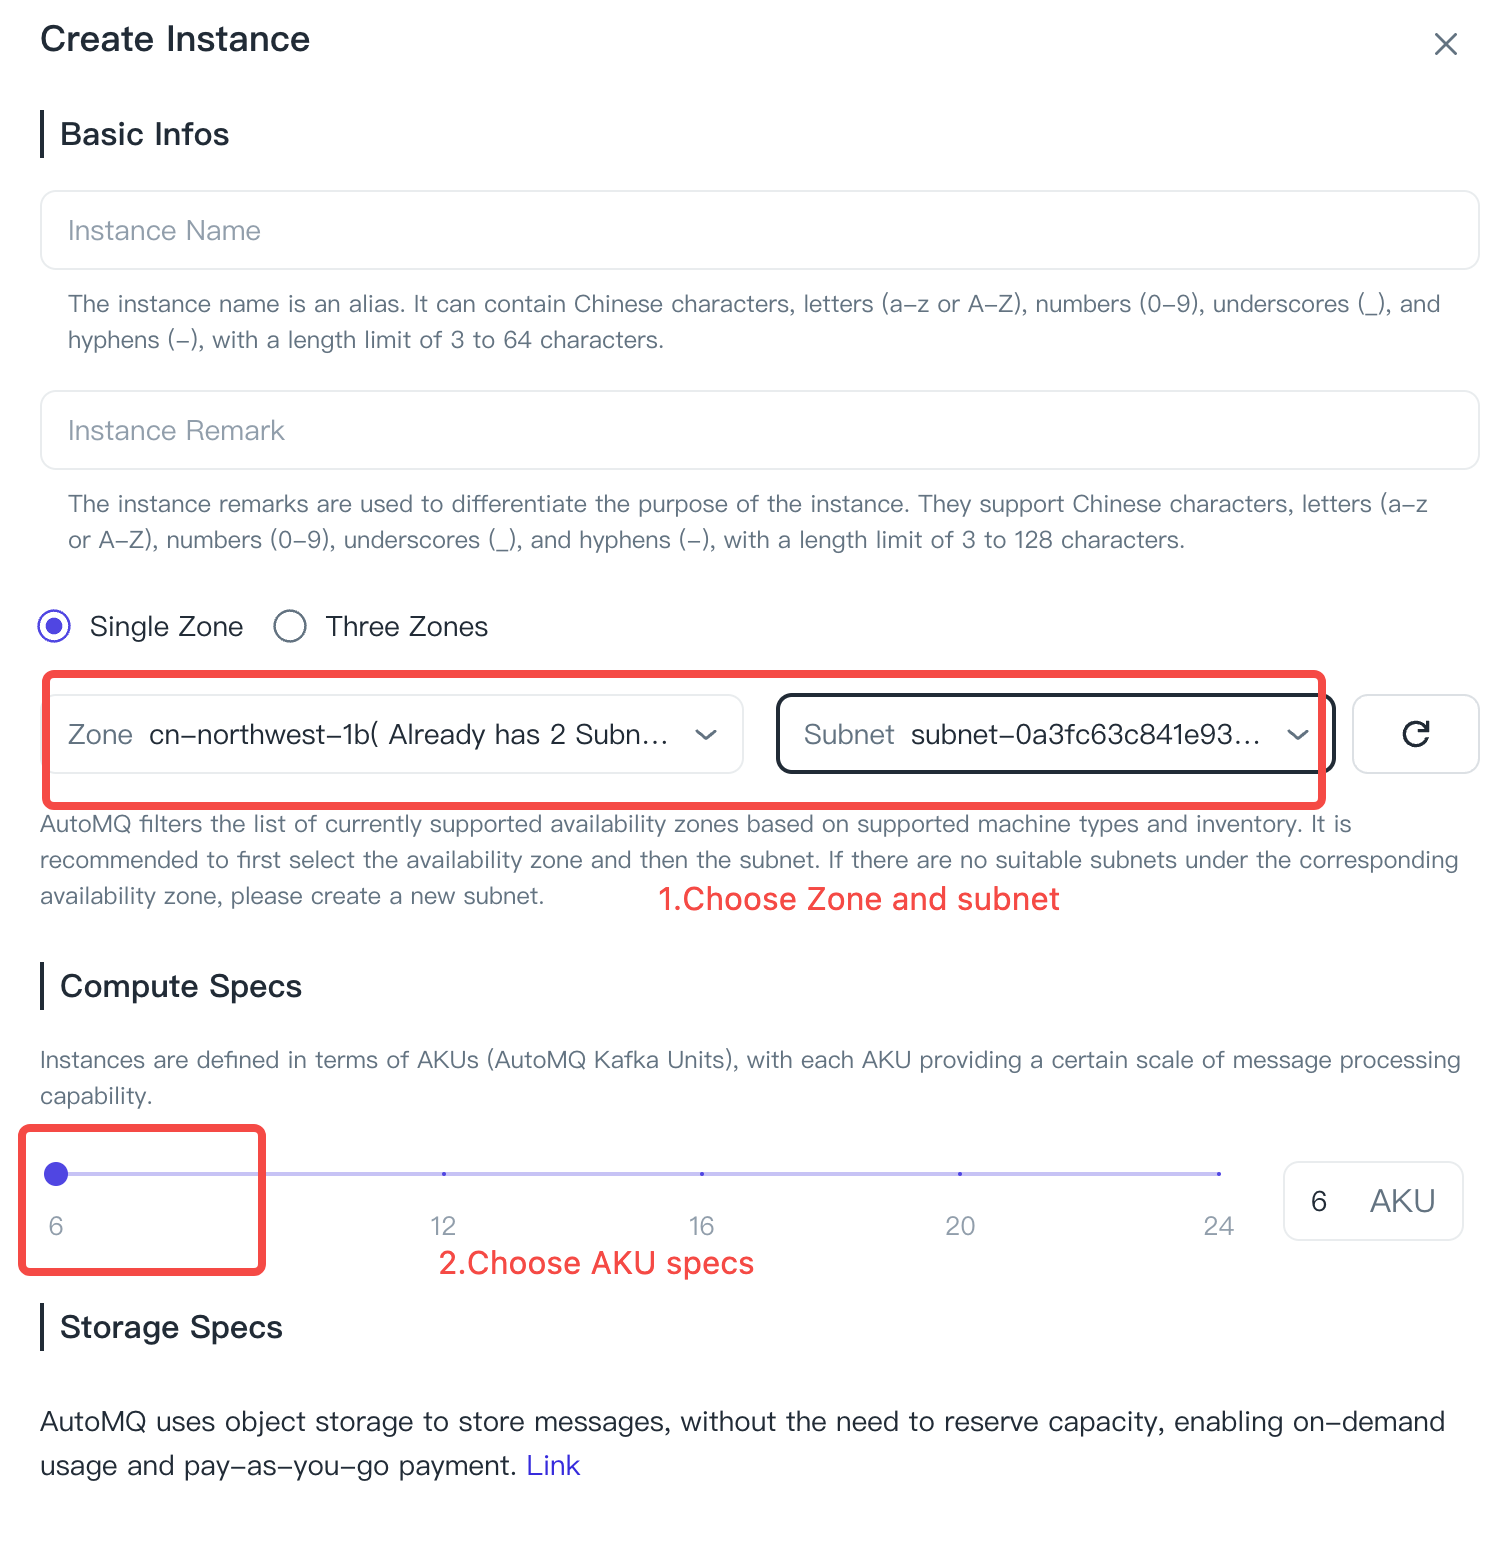
Click the "Create Instance" button and choose parameters according to the following specifications.
| Parameter | Value Description |
|---|---|
| Instance Name |
|
| Instance Note |
|
| Zone Information |
|
| Subnet Information |
|
| Compute Specifications |
|
| Storage Specifications |
|
- Click on "Create Instance" and wait for the instance to be created.
Experience Message Sending and Receiving
After the instance is created, you need to create a Topic before experiencing simple message sending and receiving. The steps are as follows:
Click on "Instance Details" to enter the instance, and then click on the "Topics" navigation bar on the left.
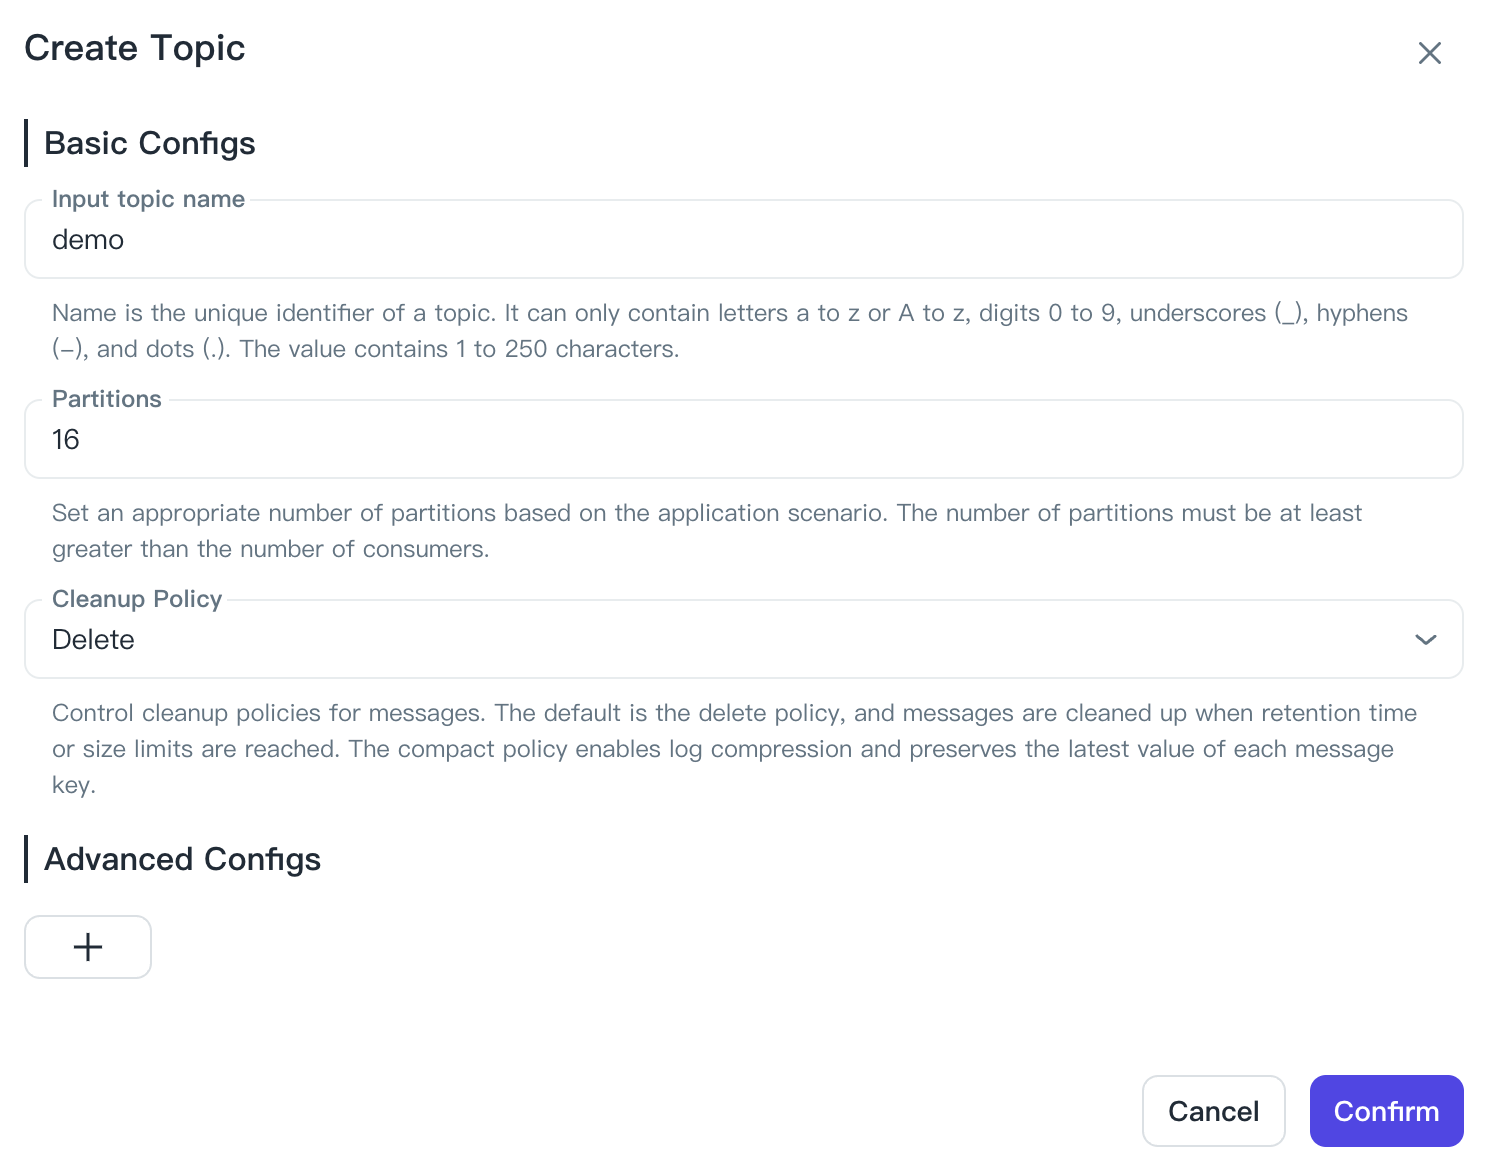
Click on "New Topic," fill in the relevant parameters, and create the Topic.
Click on the Topic name to enter the Topic details, and then click on the "Produce Message" tab.
Fill in the test message content and click "Send" to complete the functionality experience.
Next Steps
This quick start guide only demonstrates the basic process from environment creation to instance creation. AutoMQ Kafka is 100% compatible with Apache Kafka®, so for actual usage of AutoMQ Kafka, please refer to the relevant knowledge and documentation of Apache Kafka.
If there are no business requirements after the quick experience and testing, it is recommended to release the environment promptly to avoid unnecessary cloud resource consumption and incurring costs.