Skip to Main Content

CubeFS

Preface

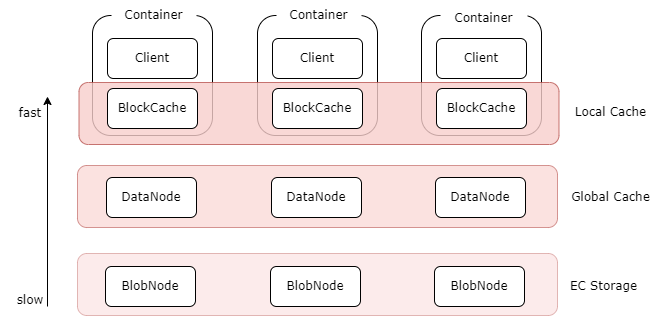
CubeFS [1] is a next-generation cloud-native storage product, currently an incubating open-source project hosted by the Cloud Native Computing Foundation (CNCF). It is compatible with multiple access protocols such as S3, POSIX, and HDFS, supporting both multi-replica and erasure coding storage engines. It provides users with features such as multi-tenancy, multi-AZ deployment, and cross-region replication. CubeFS is widely used in scenarios like big data, AI, container platforms, databases, middleware, compute-storage separation, data sharing, and data protection.

AutoMQ's innovative shared storage architecture requires low-cost object storage. CubeFS supports S3-compatible interfaces, with ObjectNode providing an S3-compatible object storage interface to operate files within CubeFS. Therefore, you can use open-source tools like S3Browser, S3Cmd, or the native Amazon S3 SDK to manage files in CubeFS, making it highly compatible with AutoMQ. You can thus deploy an AutoMQ cluster to obtain a fully Kafka-compatible streaming system that offers better cost efficiency, extreme scalability, and single-digit millisecond latency.

This article will introduce how to deploy an AutoMQ cluster onto CubeFS in your private data center.

Prerequisites

Prepare CubeFS Cluster

CubeFS supports one-click deployment of the basic cluster using scripts. The basic cluster includes components such as Master, MetaNode, and DataNode, with optional additional startup of client and ObjectNode. The steps are as follows:


cd ./cubefs
# Compile
make
# Generate the Configuration File and Start the Basic Cluster. Please Replace Bond0 with Your Own Network Interface Name.
sh ./shell/deploy.sh /home/data bond0

The default installation package of CubeFS provides a set of command-line tools for cluster management in the build/bin directory. This article will also use these command-line tools for additional configuration. Use the CubeFS command-line tools to check the cluster status and verify if the setup is successful:


# Execute the Command
./build/bin/cfs-cli cluster info

# Result Output
[Cluster]
Cluster name : cfs_dev
Master leader : 172.16.1.101:17010
Master-1 : 172.16.1.101:17010
Master-2 : 172.16.1.102:17010
Master-3 : 172.16.1.103:17010
Auto allocate : Enabled
MetaNode count (active/total) : 4/4
MetaNode used : 0 GB
MetaNode available : 21 GB
MetaNode total : 21 GB
DataNode count (active/total) : 4/4
DataNode used : 44 GB
DataNode available : 191 GB
DataNode total : 235 GB
Volume count : 2
...

Note: The IP and port of the master node of the CubeFS cluster will be used in the following object gateway configuration.

Enable the Object Gateway

To enable CubeFS to support the object storage protocol, you need to activate the object gateway [5]. The purpose of the object gateway is to provide an S3-compatible object storage interface. This allows CubeFS to support both traditional POSIX file system interfaces and S3-compatible object storage interfaces. By doing so, CubeFS can leverage the advantages of both general-purpose interfaces, providing users with a more flexible data storage and access solution. Specifically, after enabling the object gateway, users can use the native Amazon S3 SDK to operate files stored in CubeFS, thereby enjoying the convenience of object storage.

To facilitate the startup of the Object Gateway, you can directly execute the following command in the root directory of CubeFS to start the Object Gateway. This will start an Object Gateway service that listens on the default port 17410:


sh ./shell/deploy_object.sh /home/data

You will get the following result, indicating that the gateway has been successfully started:


[output]
mkdir -p /home/data/object/logs
start checking whether the volume exists
begin create volume 'objtest'
Create volume success.
begin start objectnode service
start objectnode service success

Create CubeFS User

  • Create a CubeFS user and obtain the AccessKey and Secret AccessKey information.

You can refer to the User Management Documentation [6] to create and query the corresponding user information.

CubeFS supports multiple creation methods. For example, you can create users through AWS SDK [7] or via HTTP requests. Here, we will demonstrate how to create a user through an HTTP request:

  • Specify the user id, password, and type, and request the creation interface:

curl -H "Content-Type:application/json" -X POST --data '{"id":"automq","pwd":"12345","type":2}' "http://172.16.1.101:17010/user/create"

  • Query user information by user ID:

curl -v "http://172.16.1.101:17010/user/info?user=automq" | python -m json.tool

  • Here is the response example. Here, we can obtain the user's AK and SK, which will be used as credentials for subsequent object storage operations.

{
"code": 0,
"msg": "success",
"data": {
"user_id": "automq",
"access_key": "Ys3SYUdusPxGfS7J",
"secret_key": "HdhEnzEgo63naqx8opUhXMgiBOdCKmmf",
"policy": {
"own_vols": [
],
"authorized_vols": {
}
},
"user_type": 2,
"create_time": "2024-07-17 12:12:59",
"description": "",
"EMPTY": false
}
}

Create a Bucket Using the S3 Interface.

Use the AWS CLI tool to create the necessary bucket on CubeFS for AutoMQ cluster deployment.

Obtain the user's key and other information, configure it using aws configure, and use the AWS CLI tool to create the bucket.


aws s3api create-bucket --bucket automq-data --endpoint=http://127.0.0.1:17410
aws s3api create-bucket --bucket automq-ops --endpoint=http://127.0.0.1:17410

Use commands to view existing buckets.


aws s3 ls --endpoint=http://127.0.0.1:17410

Prepare the Machines Required for AutoMQ Deployment.

Prepare 5 hosts for deploying the AutoMQ cluster. It is recommended to choose Linux amd64 hosts with 2 cores and 16GB memory and prepare two virtual storage volumes. An example is shown below:

Role
IP
Node ID
System Volume
Data Volume
CONTROLLER
192.168.0.1
0
EBS 20GB
EBS 20GB
CONTROLLER
192.168.0.2
1
EBS 20GB
EBS 20GB
CONTROLLER
192.168.0.3
2
EBS 20GB
EBS 20GB
BROKER
192.168.0.4
3
EBS 20GB
EBS 20GB
BROKER
192.168.0.5
4
EBS 20GB
EBS 20GB

Tips:

  • Ensure these machines are within the same subnet and can communicate with each other.

  • For non-production environments, it is also possible to deploy only one Controller, which by default also serves as a Broker.

Install and Start the AutoMQ Cluster.

Configure S3URL.

Step 1: Generate the S3 URL.

AutoMQ provides the automq-kafka-admin.sh tool for quickly starting AutoMQ. By supplying an S3 URL containing the necessary S3 access points and authentication information, you can launch AutoMQ with a single command, without needing to manually generate a cluster ID or format storage.


### Command Line Usage Example.
bin/automq-kafka-admin.sh generate-s3-url \
--s3-access-key=xxx \
--s3-secret-key=yyy \
--s3-region=cn-northwest-1 \
--s3-endpoint=s3.cn-northwest-1.amazonaws.com.cn \
--s3-data-bucket=automq-data \
--s3-ops-bucket=automq-ops

If you encounter an error, please verify the correctness and format of the parameters.

When using CubeFS, you can use the following configuration to generate a specific S3 URL.

Parameter Name
Default Value in This Example
Description
--s3-access-key
XXX
After creating a CubeFS user, remember to replace it with the actual value
--s3-secret-key
YYY
After creating a CubeFS user, remember to replace it with the actual value
--s3-region
auto
This can be set to the cluster name, or auto
--s3-endpoint
http://Host IP:17140
This parameter is the S3 endpoint of CubeFS
--s3-data-bucket
automq-data
The bucket name of CubeFS
--s3-ops-bucket
automq-ops
CubeFS bucket name

Output Results

After executing the command, the following stages will be performed automatically:

  1. Probe basic S3 functionality using the provided accessKey and secretKey to verify the compatibility between AutoMQ and S3.

  2. Generate the s3url based on the identity information and access point information.

  3. Retrieve the startup command example for AutoMQ using the s3url. In the command, replace --controller-list and --broker-list with the actual CONTROLLER and BROKER that need to be deployed.

Example output is as follows:


############ Ping S3 ########################

[ OK ] Write s3 object
[ OK ] Read s3 object
[ OK ] Delete s3 object
[ OK ] Write s3 object
[ OK ] Upload s3 multipart object
[ OK ] Read s3 multipart object
[ OK ] Delete s3 object
############ String of S3url ################

Your s3url is:

s3://s3.cn-northwest-1.amazonaws.com.cn?s3-access-key=xxx&s3-secret-key=yyy&s3-region=cn-northwest-1&s3-endpoint-protocol=https&s3-data-bucket=automq-data&s3-path-style=false&s3-ops-bucket=automq-ops&cluster-id=40ErA_nGQ_qNPDz0uodTEA


############ Usage of S3url ################
To start AutoMQ, generate the start commandline using s3url.
bin/automq-kafka-admin.sh generate-start-command \
--s3-url="s3://s3.cn-northwest-1.amazonaws.com.cn?s3-access-key=XXX&s3-secret-key=YYY&s3-region=cn-northwest-1&s3-endpoint-protocol=https&s3-data-bucket=automq-data&s3-path-style=false&s3-ops-bucket=automq-ops&cluster-id=40ErA_nGQ_qNPDz0uodTEA" \
--controller-list="192.168.0.1:9093;192.168.0.2:9093;192.168.0.3:9093" \
--broker-list="192.168.0.4:9092;192.168.0.5:9092"

TIPS: Please replace the controller-list and broker-list with your actual IP addresses.

Step 2: Generate the List of Startup Commands

Replace the --controller-list and --broker-list in the previously generated command with your host information. Specifically, replace them with the IP addresses of the 3 CONTROLLER and 2 BROKER machines mentioned in the environment preparation, using the default ports 9092 and 9093.


bin/automq-kafka-admin.sh generate-start-command \
--s3-url="s3://s3.cn-northwest-1.amazonaws.com.cn?s3-access-key=XXX&s3-secret-key=YYY&s3-region=cn-northwest-1&s3-endpoint-protocol=https&s3-data-bucket=automq-data&s3-path-style=false&s3-ops-bucket=automq-ops&cluster-id=40ErA_nGQ_qNPDz0uodTEA" \
--controller-list="192.168.0.1:9093;192.168.0.2:9093;192.168.0.3:9093" \
--broker-list="192.168.0.4:9092;192.168.0.5:9092"

Parameter Description

Parameter Name
Required
Description
--s3-url
Yes
Generated by the bin/automq-kafka-admin.sh generate-s3-url command-line tool, includes authentication, cluster ID, and other information
--controller-list
Yes
At least one address is required, used as the IP and port list of the CONTROLLER hosts. Format: IP1:PORT1;IP2:PORT2;IP3:PORT3
--broker-list
Yes
At least one address is required, used as the IP and port list of the BROKER hosts. Format: IP1:PORT1;IP2:PORT2;IP3:PORT3
--controller-only-mode
No
Determines whether the CONTROLLER nodes only act as CONTROLLER. Default is false, meaning the deployed CONTROLLER nodes also serve as BROKER roles.

Output Results

Executing the command will generate the command used to start AutoMQ.


############ Start Commandline ##############
To start an AutoMQ Kafka server, please navigate to the directory where your AutoMQ tgz file is located and run the following command.

Before running the command, make sure that Java 17 is installed on your host. You can verify the Java version by executing 'java -version'.

bin/kafka-server-start.sh --s3-url="s3://s3.cn-northwest-1.amazonaws.com.cn?s3-access-key=XXX&s3-secret-key=YYY&s3-region=cn-northwest-1&s3-endpoint-protocol=https&s3-data-bucket=automq-data&s3-path-style=false&s3-ops-bucket=automq-ops&cluster-id=40ErA_nGQ_qNPDz0uodTEA" --override process.roles=broker,controller --override node.id=0 --override controller.quorum.voters=0@192.168.0.1:9093,1@192.168.0.2:9093,2@192.168.0.3:9093 --override listeners=PLAINTEXT://192.168.0.1:9092,CONTROLLER://192.168.0.1:9093 --override advertised.listeners=PLAINTEXT://192.168.0.1:9092

bin/kafka-server-start.sh --s3-url="s3://s3.cn-northwest-1.amazonaws.com.cn?s3-access-key=XXX&s3-secret-key=YYY&s3-region=cn-northwest-1&s3-endpoint-protocol=https&s3-data-bucket=automq-data&s3-path-style=false&s3-ops-bucket=automq-ops&cluster-id=40ErA_nGQ_qNPDz0uodTEA" --override process.roles=broker,controller --override node.id=1 --override controller.quorum.voters=0@192.168.0.1:9093,1@192.168.0.2:9093,2@192.168.0.3:9093 --override listeners=PLAINTEXT://192.168.0.2:9092,CONTROLLER://192.168.0.2:9093 --override advertised.listeners=PLAINTEXT://192.168.0.2:9092

bin/kafka-server-start.sh --s3-url="s3://s3.cn-northwest-1.amazonaws.com.cn?s3-access-key=XXX&s3-secret-key=YYY&s3-region=cn-northwest-1&s3-endpoint-protocol=https&s3-data-bucket=automq-data&s3-path-style=false&s3-ops-bucket=automq-ops&cluster-id=40ErA_nGQ_qNPDz0uodTEA" --override process.roles=broker,controller --override node.id=2 --override controller.quorum.voters=0@192.168.0.1:9093,1@192.168.0.2:9093,2@192.168.0.3:9093 --override listeners=PLAINTEXT://192.168.0.3:9092,CONTROLLER://192.168.0.3:9093 --override advertised.listeners=PLAINTEXT://192.168.0.3:9092

bin/kafka-server-start.sh --s3-url="s3://s3.cn-northwest-1.amazonaws.com.cn?s3-access-key=XXX&s3-secret-key=YYY&s3-region=cn-northwest-1&s3-endpoint-protocol=https&s3-data-bucket=automq-data&s3-path-style=false&s3-ops-bucket=automq-ops&cluster-id=40ErA_nGQ_qNPDz0uodTEA" --override process.roles=broker --override node.id=3 --override controller.quorum.voters=0@192.168.0.1:9093,1@192.168.0.2:9093,2@192.168.0.3:9093 --override listeners=PLAINTEXT://192.168.0.4:9092 --override advertised.listeners=PLAINTEXT://192.168.0.4:9092

bin/kafka-server-start.sh --s3-url="s3://s3.cn-northwest-1.amazonaws.com.cn?s3-access-key=XXX&s3-secret-key=YYY&s3-region=cn-northwest-1&s3-endpoint-protocol=https&s3-data-bucket=automq-data&s3-path-style=false&s3-ops-bucket=automq-ops&cluster-id=40ErA_nGQ_qNPDz0uodTEA" --override process.roles=broker --override node.id=4 --override controller.quorum.voters=0@192.168.0.1:9093,1@192.168.0.2:9093,2@192.168.0.3:9093 --override listeners=PLAINTEXT://192.168.0.5:9092 --override advertised.listeners=PLAINTEXT://192.168.0.5:9092


TIPS: Start controllers first and then the brokers.

The node.id is automatically generated starting from 0 by default.

Step 3: Start AutoMQ

To start the cluster, execute the list of commands generated in the previous step sequentially on the predefined CONTROLLER or BROKER hosts. For example, to start the first CONTROLLER process on 192.168.0.1, execute the first command template from the generated startup command list.


bin/kafka-server-start.sh --s3-url="s3://s3.cn-northwest-1.amazonaws.com.cn?s3-access-key=XXX&s3-secret-key=YYY&s3-region=cn-northwest-1&s3-endpoint-protocol=https&s3-data-bucket=automq-data&s3-path-style=false&s3-ops-bucket=automq-ops&cluster-id=40ErA_nGQ_qNPDz0uodTEA" --override process.roles=broker,controller --override node.id=0 --override controller.quorum.voters=0@192.168.0.1:9093,1@192.168.0.2:9093,2@192.168.0.3:9093 --override listeners=PLAINTEXT://192.168.0.1:9092,CONTROLLER://192.168.0.1:9093 --override advertised.listeners=PLAINTEXT://192.168.0.1:9092

Parameter Description

When using the startup command, any unspecified parameters will adopt the default configuration of Apache Kafka. For parameters defined by AutoMQ, AutoMQ's default values will be used. To override default configurations, you can append additional --override key=value parameters at the end of the command.

Parameter Name
Required
Description
s3-url
Yes
Generated by the bin/automq-kafka-admin.sh generate-s3-url command-line tool, containing authentication, cluster ID, and other information
process.roles
Yes
Options are CONTROLLER or BROKER. If a host acts as both CONTROLLER and BROKER, the configuration value should be CONTROLLER,BROKER.
node.id
Yes
An integer used to uniquely identify the BROKER or CONTROLLER within a Kafka cluster. It must remain unique within the cluster.
controller.quorum.voters
Yes
Information about hosts participating in the KRAFT election, including nodeid, IP, and port information, e.g., 0@192.168.0.1:9093, 1@192.168.0.2:9093, 2@192.168.0.3:9093
listeners
Yes
The IP and port to listen on
advertised.listeners
Yes
The access address that BROKER provides for clients.
log.dirs
No
Directories for storing KRAFT and BROKER metadata.
s3.wal.path
No
In a production environment, it is recommended to store AutoMQ WAL data on a newly mounted data volume bare device. This setup can achieve better performance as AutoMQ supports writing data to a bare device, thereby reducing latency. Please ensure the correct path is configured to store the WAL data.
autobalancer.controller.enable
No
Default value is false. If set to true, traffic self-balancing is enabled. When AutoMQ's auto balancer component is enabled, it will automatically reassign partitions to ensure overall traffic balance.

Tips:

If you need to enable continuous traffic self-balancing or run Example: Self-Balancing When Cluster Nodes Change, it is recommended to explicitly specify the parameter --override autobalancer.controller.enable=true when starting the Controller.

When deploying AutoMQ in a private data center for production environments, ensure the reliability of local SSDs. CubeFS does not support highly available block device protocols, so it cannot directly manage disk redundancy or backups. However, you can address this by using RAID solutions.

Background Operation

If you need to run in background mode, add the following code at the end of the command:


command > /dev/null 2>&1 &

At this point, you have completed the deployment of an AutoMQ cluster based on CubeFS, featuring a low-cost, low-latency, and second-level elastic Kafka cluster. If you want to further experience AutoMQ's second-level partition reassignment and continuous self-balancing features, you can refer to the official examples.

References

[1] CubeFS: https://www.cubefs.io/

[2] CubeFS Multi-Level Cache: https://www.cubefs.io/docs/master/overview/introduction.html

[3] Dependency Configuration: CubeFS | A Cloud Native Distributed Storage System

[4] CubeFS Single-node Deployment: www.cubefs.io

[5] Object Gateway: https://www.cubefs.io/docs/master/design/objectnode.html

[6] CubeFS User Management Documentation: CubeFS | A Cloud Native Distributed Storage System

[7] CubeFS AWS SDK: https://www.cubefs.io/docs/master/user-guide/objectnode.html#%E6%94%AF%E6%8C%81%E7%9A%84sdk

[8] RAID: https://www.cnblogs.com/chuncn/p/6008173.html