Experience AutoMQ for Kafka
After you've set up the environment and completed all necessary initializations, this article will guide you through the process of quickly creating a Kafka instance for both sending and receiving messages.
Throughout this article, any references to AutoMQ, or its service providers, are specifically about "AutoMQ CO."
Prerequisites
Before you can create a Kafka instance, you must meet certain prerequisites to ensure that the environment setup is complete. If not, please follow the outlined steps here:
Creating an Instance
To begin using AutoMQ for Kafka, you first need to create an instance; each instance is linked to an open-source Apache Kafka® cluster. Users interact with the front-end interface of the environment console to create an instance, while the backend manages the creation of underlying cloud resources and completes the software deployment.
The procedure is as follows:
Go to the environment console URL and log into the console.
Access the Environment Control Console, click the left navigation bar, and navigate to the instance list.
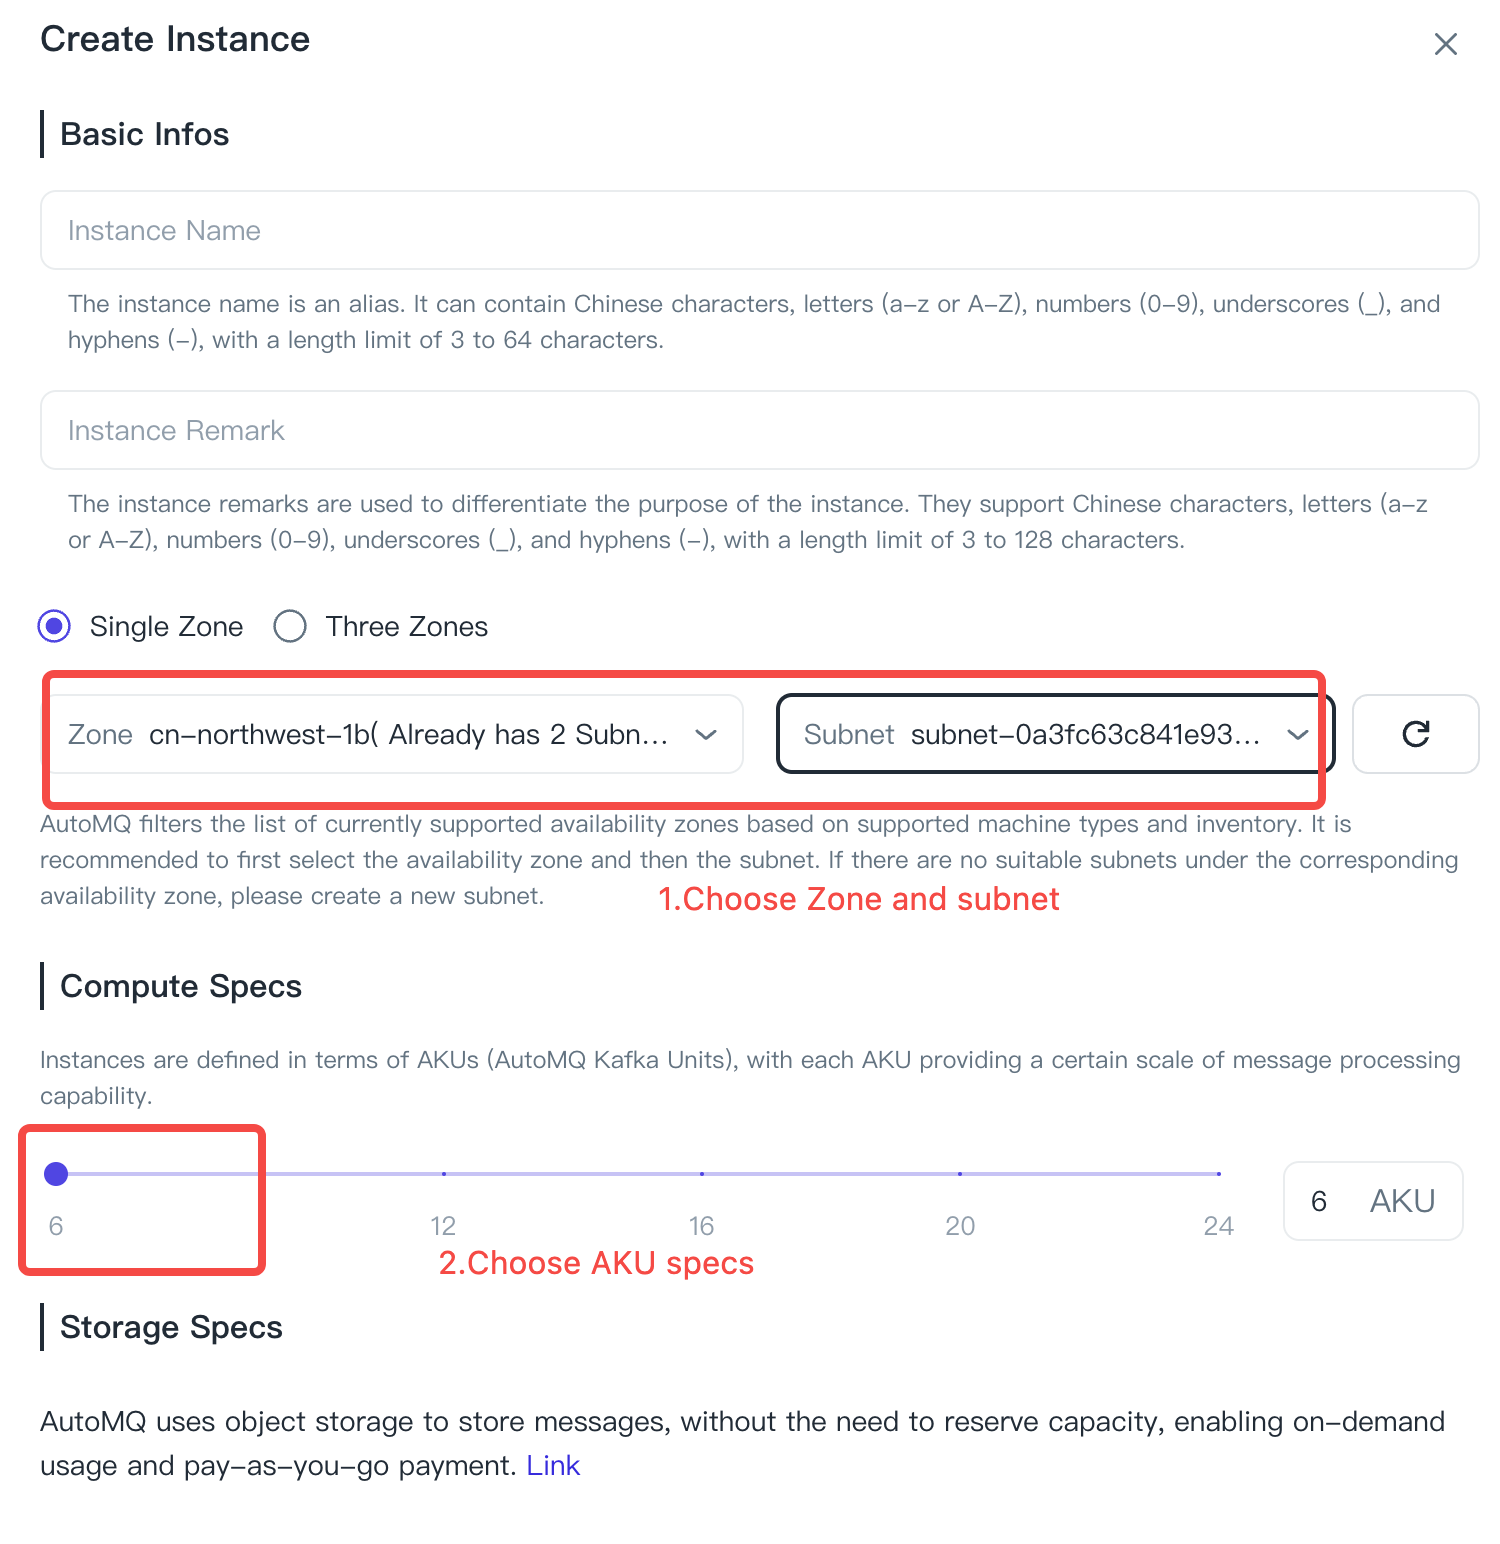
Click the "Create Instance" button and choose parameters according to the following specifications.
| Parameter | Value Description |
|---|---|
| Instance Name |
|
| Instance Remarks |
|
| Availability Zone Information |
|
| Subnet Information |
|
| Compute Specification |
|
| Storage Specifications |
|
- Initiate the instance creation and wait for the completion of the setup.
Experience Message Sending and Receiving
Once the instance is ready, before diving into basic message sending and receiving, you'll need to set up a Topic. Here’s how to proceed:
Click on instance details, access the instance, and select the Topics tab on the left-hand navigation.
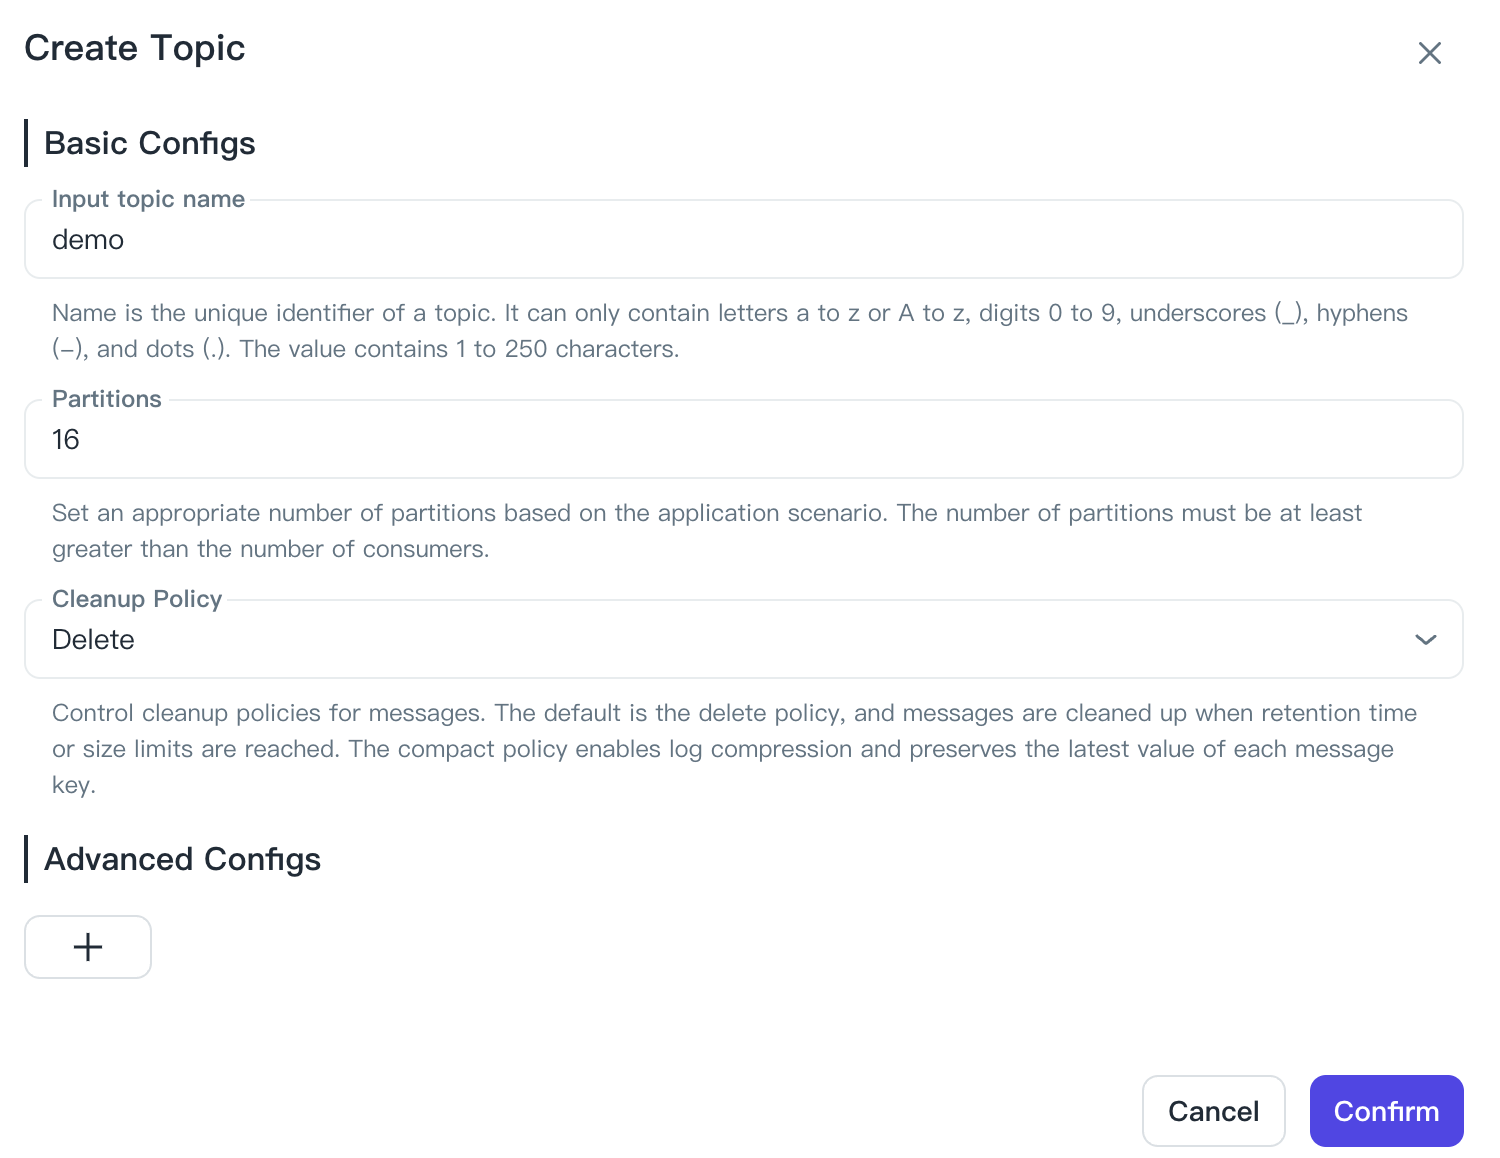
Choose Create Topic, input the necessary parameters, and finalize the topic creation.
Click on the topic name, go to the topic details, and select the Produce Message tab.
Type in your test message and hit send to complete the test experience.
Subsequent Steps
This quick-start guide outlines the fundamental steps from setting up the environment to creating an instance. AutoMQ Kafka is fully compatible with Apache Kafka®, so for practical applications, please consult the relevant Apache Kafka® documentation and resources.
If there are no ongoing business requirements after a brief exploration and testing, it is recommended to decommission the environment promptly to prevent unnecessary consumption of cloud resources and additional expenses.